Gin Rummy Strategy Guide
Gin Rummy Strategy Guide
Gin rummy gives each player ten cards and one clear goal: reduce your deadwood — the points in unmatched cards — before your opponent does. The rules take a few minutes to learn. The decisions that determine who wins are what this guide is about.
Every round of gin rummy produces two types of decisions: what to draw and what to discard. Neither decision is random. The right choices follow from a clear understanding of hand value, opponent information, and risk management.
1. Evaluate Your Hand Before You Play
When you receive your ten cards, spend a moment categorising them before discarding anything.
Completed melds are sets of three or more cards with the same rank (three Jacks, four 7s) or runs of three or more consecutive cards in the same suit (4-5-6 of Hearts). These cards contribute zero deadwood.
Partial melds are two cards that could become a meld with one more draw — a pair, two consecutive same-suit cards, or two cards one step apart in the same suit (a 5 and a 7 of Clubs, waiting for the 6). These are worth keeping.
Isolated high cards — face cards and 10s not connected to anything — are the most dangerous cards in your hand. Each costs 10 points in deadwood if your opponent knocks before you. These should go first.
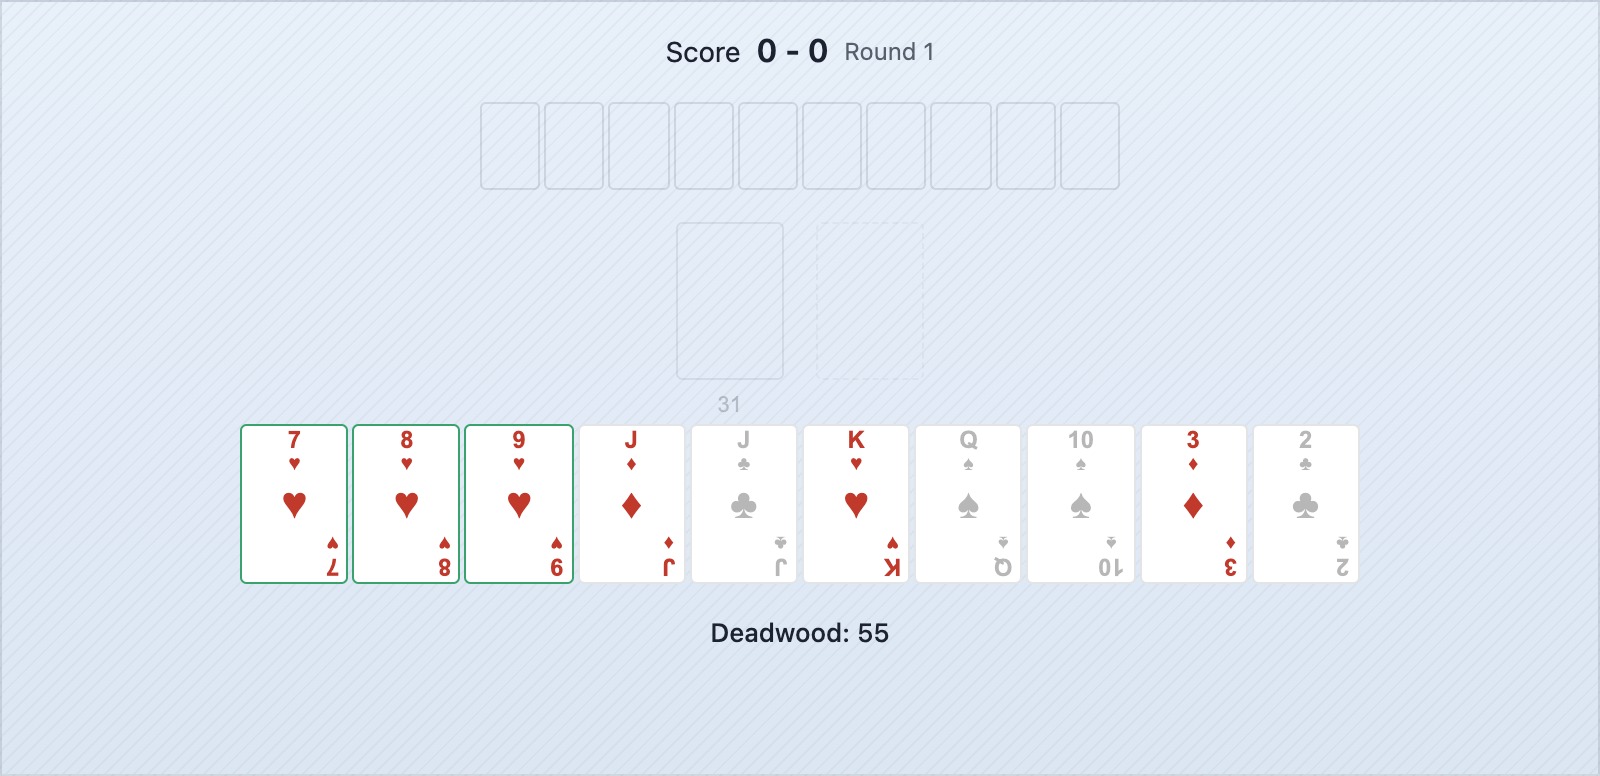
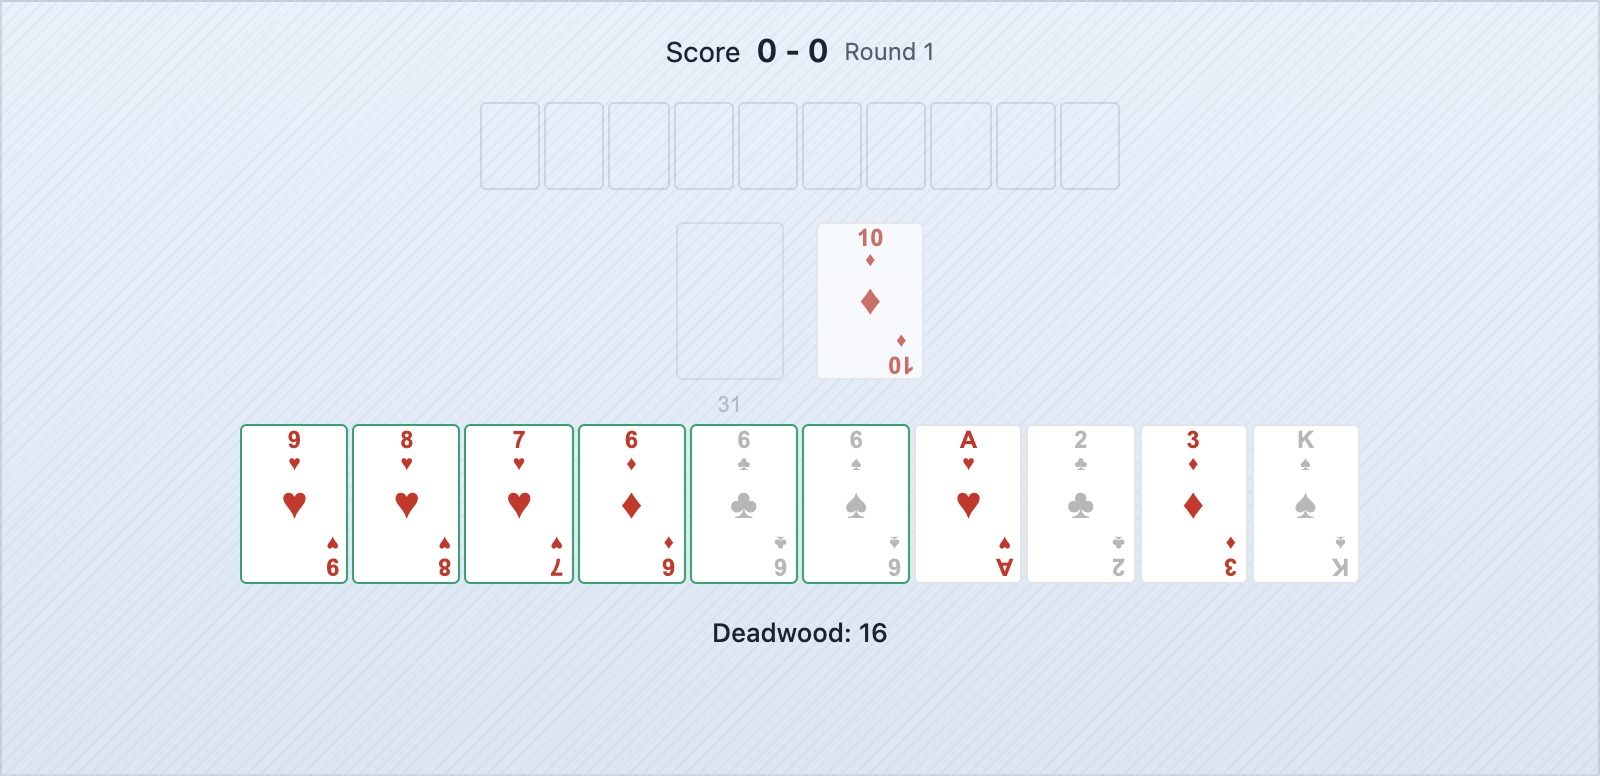
The run 7-8-9 of Hearts is already complete. The pair of Jacks is a strong partial meld — one draw completes it. The King, Queen, and Ten of Spades are isolated deadwood worth 30 points combined. They should be discarded before anything else.
The shape of your hand after this assessment tells you what kind of round you are in. A hand with two partial melds and three high isolated cards calls for aggressive discarding. A hand already near a knock calls for patience and defence.
2. Manage Deadwood — High Cards First
The most reliable strategic habit in gin rummy is simple: discard your most expensive unconnected cards as early as possible.
Face cards (Jack, Queen, King) and 10s each carry 10 deadwood points. A hand with three unconnected face cards carries 30 points of deadwood before the round has started — well above the 10-point knock threshold. If your opponent knocks while you hold those cards, you lose the full difference.
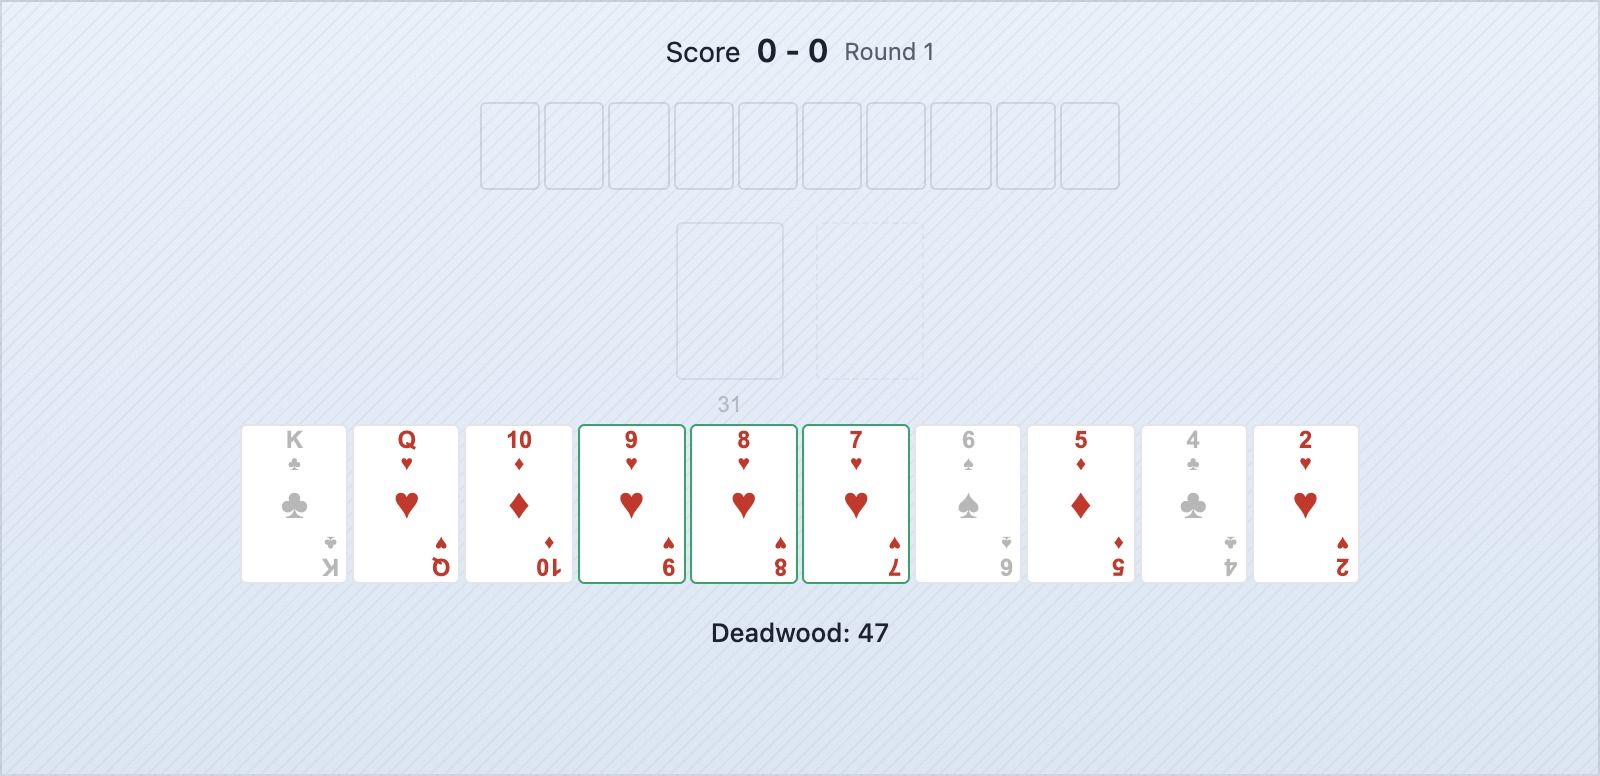
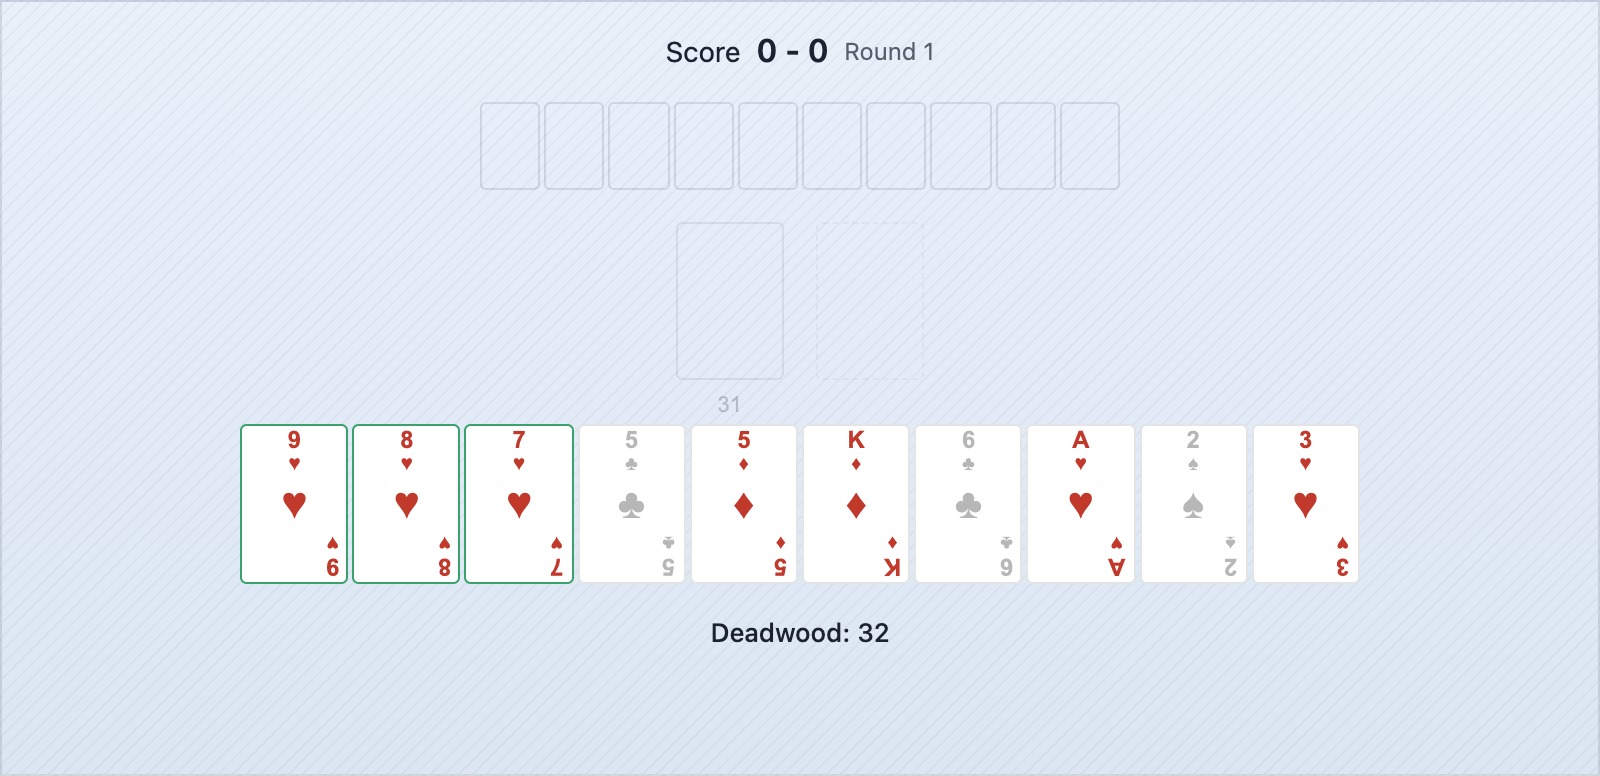
The run 7-8-9 of Hearts is complete. The 5-6 partial is developing. But the King, Queen, and Ten are worth 30 points in deadwood and have no connections. They are the correct first three discards, in any order.
The priority order for discarding:
- Isolated face cards and 10s with no connection to any partial meld
- Isolated mid-range cards not adjacent to anything held
- High-value partial melds that have stalled after three or more draws
An Ace carries only 1 deadwood point. A 2 carries 2. Low isolated cards can be held much longer than their face-value equivalents without meaningful cost.
3. Prefer Flexible Cards in Your Partial Melds
When choosing between two partial melds to develop, favour the one built around middle-rank cards.
A 7 of Hearts can form a run with 5-6, 6-8, or 8-9 of Hearts — three different two-card combinations in hand would complete it. A King of Hearts can only extend toward J-Q or Q-J, and there is no card above it.
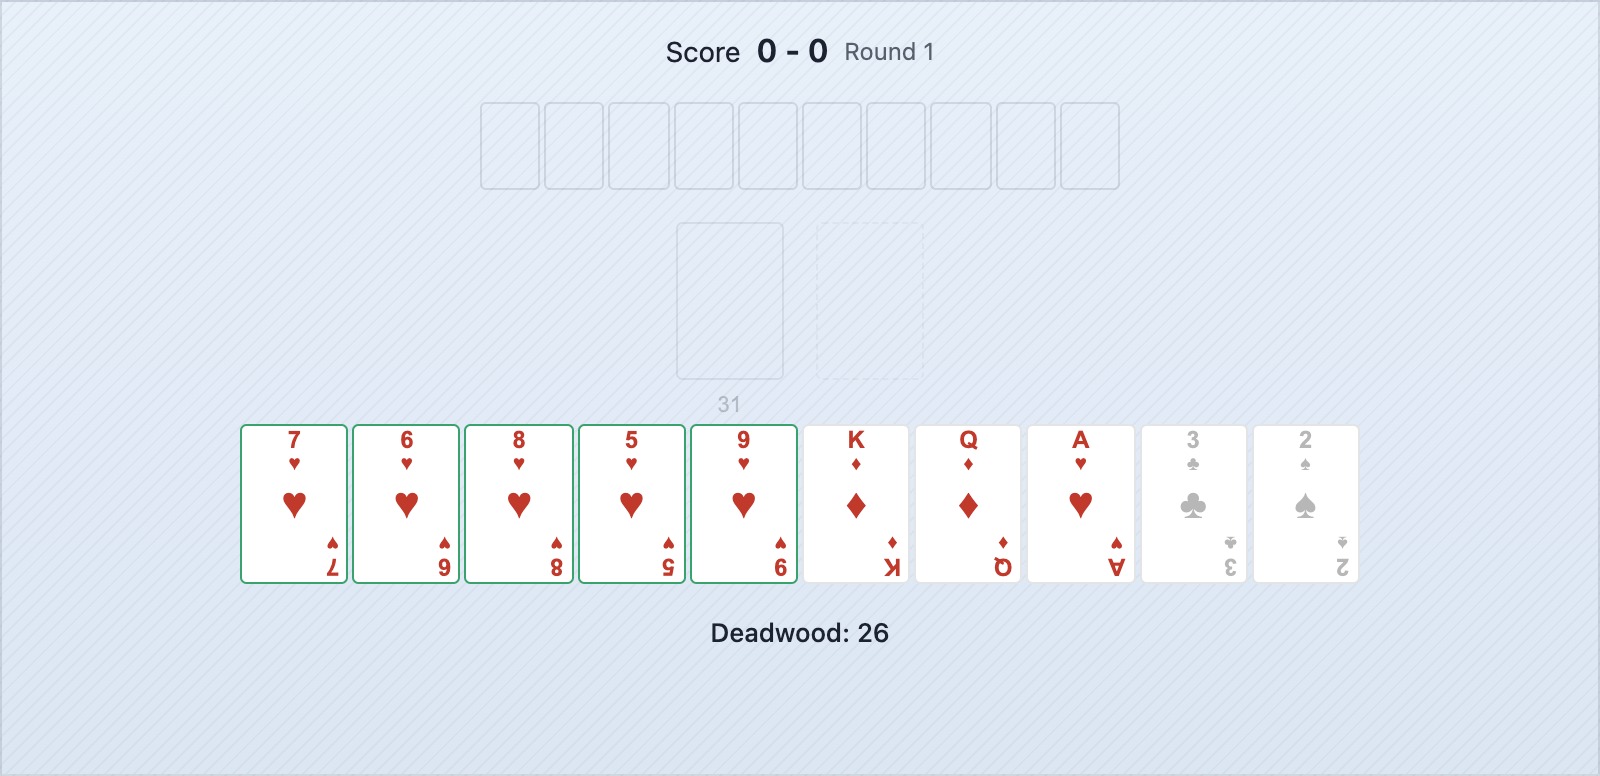
The 7 of Hearts sits at the centre of three possible runs. The 6-7 partial already in hand extends to 5-6-7 or 6-7-8. The King of Diamonds can only complete with J-Q of Diamonds. If you must discard one partial, the King-Queen is the weaker choice.
The flexibility ranking by rank, from most to least:
- 5, 6, 7, 8 — maximum flexibility, can join runs on either side and form sets with three other ranks
- 4, 9 — slightly less flexible, one fewer run option on one end
- 3, 10 — moderate; Tens are expensive, 3s are cheap
- 2, Jack, Queen — limited run options in one direction
- Ace, King — can only anchor one end of a run, Kings are expensive
4. Knock Timing — The Most Consequential Decision
Knocking ends the round. The player with lower deadwood wins, and the margin is the points scored. If you knock and your opponent's deadwood equals or beats yours after laying off, they undercut you and earn a 25-point bonus. If you go gin, you earn a 25-point bonus. If you wait too long, your opponent knocks first.
The general rule: knock when your deadwood is 5 or less.
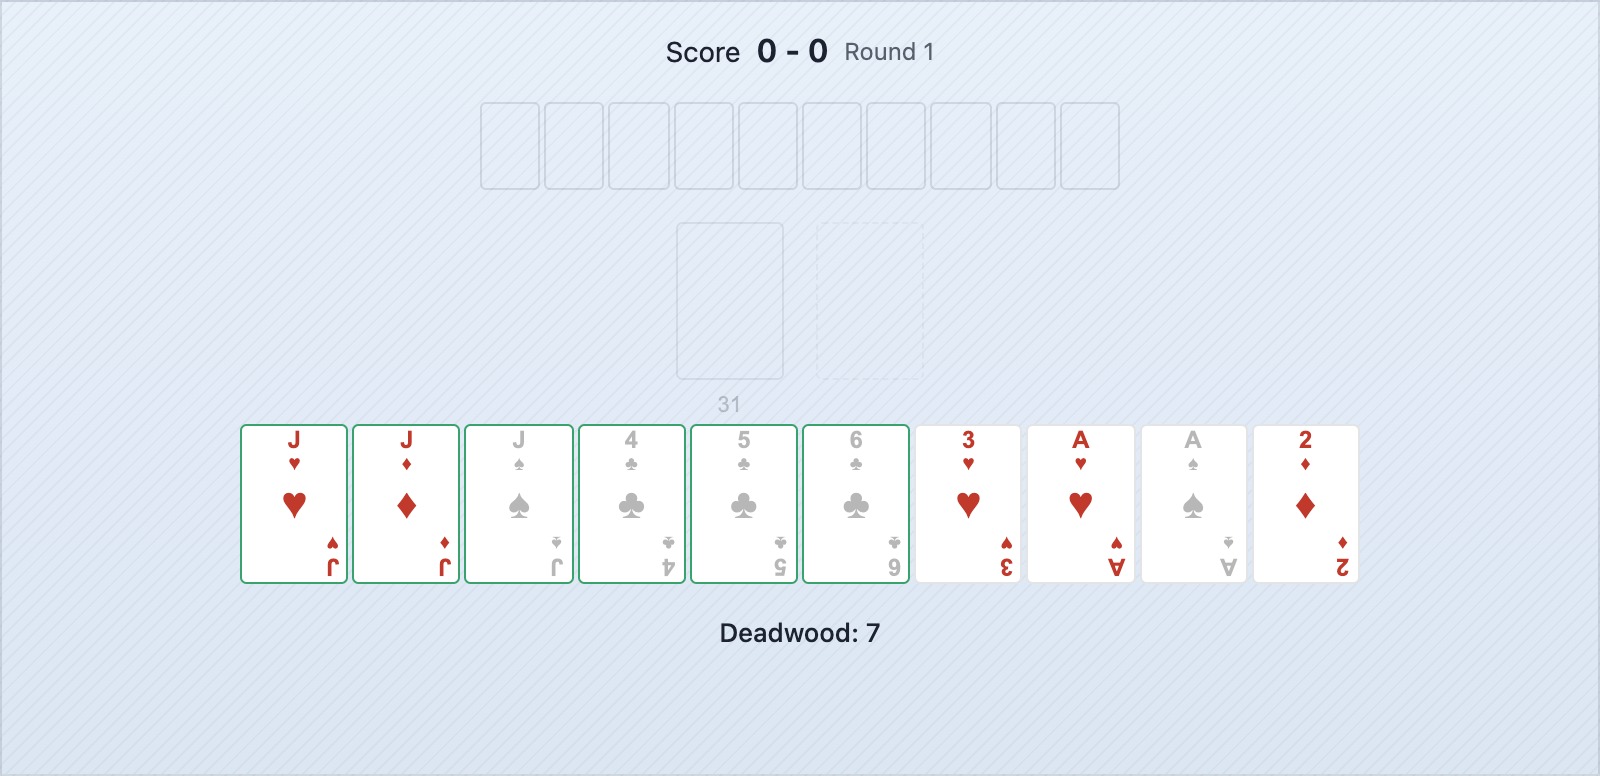
Two complete melds leave four deadwood cards. Discarding the 3 of Hearts brings deadwood to 4 points — well within knock range. Waiting for gin here means drawing three more specific cards. The knock is the correct play.
At 5 or less deadwood, the undercut risk is small. Your opponent has very few remaining cards that could reduce their deadwood to match or beat yours after lay-offs. Time spent waiting for gin is time your opponent might use to knock first.
When to hold for gin:
- Deadwood is 1 or 2 and you need only one card to complete gin
- The round is early and the card needed has not appeared in the discard pile
- Your meld structure can absorb almost any draw without adding deadwood
When not to wait:
- Deadwood is 4–10 and gin requires two or more specific cards
- Your opponent has been drawing and discarding carefully
- You have already passed multiple chances to knock
5. Reading the Discard Pile
The discard pile is an open information channel. The cards there have been rejected — or in the case of pickups, specifically wanted.
What opponent discards tell you. If your opponent discards a Queen of Spades, they probably do not hold other Queens or high Spades. That makes those cards safer to discard yourself — your opponent will not pick them up, and the discard reveals little about your hand.
The opponent has discarded King, Queen, Jack, Ten in sequence — they are building low. Safe discards include any high cards still in your hand. The King of Spades in your deadwood should go next.
What opponent pickups reveal. When your opponent takes a card from the discard pile, you know exactly what they took and roughly what meld they are building. Picking up the 8 of Clubs means they likely hold 6-7, 7-9, or other 8s. Avoid discarding cards that extend that meld.
A simple rule: treat every pickup as a signal and every discard as a clue. Neither action is private.
6. Defensive Discarding — Safe vs Dangerous Cards
The card you discard becomes available to your opponent. The best discard reduces your deadwood and gives your opponent nothing useful.
Safe discards:
- Cards in the same rank or suit as cards your opponent has already discarded — they have signalled no interest
- Cards far in rank from anything your opponent has picked up
- Low-value cards (Aces, 2s, 3s) that minimally affect your deadwood and carry little meld threat
Dangerous discards:
- Cards adjacent to or in the same suit as a card your opponent recently picked up
- The card that visibly completes a meld your opponent is building
- High-value cards early in the round that would hand your opponent both a meld and information about their draw
The opponent picked up the 7 of Clubs on the previous turn. Discarding the 6 of Clubs would hand them a straight with 6-7-8. The King of Diamonds carries 10 deadwood points and should go first — the opponent has shown no interest in high Diamonds.
When no safe discard is obvious, choose the card that gives the least information — a rank already heavily discarded, or a suit far from your opponent's pickups.
7. The Undercut Risk
The undercut is the single most painful outcome for a knocker. You end the round expecting to win, reveal your hand, and then watch your opponent lay off cards and finish with equal or lower deadwood — earning 25 bonus points while you earn nothing.
Undercuts happen for three main reasons:
Knocking with too much deadwood. At 9 or 10 deadwood, your opponent only needs to land below that threshold after lay-offs. At 10, almost any hand can undercut you with a good lay-off opportunity.
Underestimating lay-off potential. When you knock, your opponent may add cards to your melds. A player holding 5-6 of Clubs who sees your 7-8-9 of Clubs meld can extend it, reducing their deadwood by the value of both cards at once.
The knocker holds 12 deadwood — too high. The opponent has 14 deadwood before lay-offs but lays the 6 of Hearts onto the knocker's 7-8-9 run, dropping to 8. The knocker is undercut. Waiting one more turn to reduce deadwood below 8 would have avoided this.
To minimise undercut risk: knock at 5 or less, consider what lay-offs your melds expose, and pay attention to how efficiently your opponent has been drawing.
8. Late-Game Deck Management
As the stock pile shrinks, the odds of drawing a specific card worsen and the cards already seen form a nearly complete record.
Track what has been discarded. Cards in the discard pile cannot be drawn from the stock. If you need the 6 of Hearts to complete a run and it is visible in the discard pile, that meld is dead. Abandon it and move to an alternative.
Count remaining stock. When the stock runs low — under ten cards — the round may end in a draw if neither player knocks. In that situation, knocking at almost any deadwood is better than waiting.
Two melds complete, three 2s nearly a meld, only the 6 of Hearts as isolated deadwood. Stock has five cards remaining. If the next draw is not a 2 or a card that replaces the 6 of Hearts, knock at 6 deadwood — waiting further risks a draw.
Adjust when a meld is blocked. If a key card is visible in the discard pile or clearly in your opponent's hand, break up the stalled partial meld. High-value cards in a dead partial cost more in deadwood than a simpler meld built from what remains available.
9. The Most Common Strategic Mistakes
Holding high-card partial melds too long. A pair of Kings is 20 deadwood and becomes a meld only if you draw the third King — which may already be gone. After two draws without progress, discard one.
Waiting for gin when a knock is available. The gin bonus is attractive but the opportunity cost is real. Passing a knock at 2 deadwood to chase gin often ends with your opponent knocking first.
Picking up from the discard pile too freely. Each pickup reveals your plan. Reserve discard-pile draws for cards that complete melds.
Ignoring opponent pickups. If your opponent has taken two cards from the discard pile in the same suit, stop discarding that suit immediately.
Playing defensively when you should be aggressive. Late in the round with low deadwood, knock. Overthinking the undercut risk at 3 deadwood costs you more rounds than it saves.
Try These Ideas in a Game
Strategy is most useful when tested immediately. Play Gin Rummy on Playboard — no download or sign-up needed. Challenge a friend or play against a bot and use each round to try one idea at a time.
Frequently Asked Questions
- Should I always try to go gin instead of knocking?
- No. Waiting for gin is the most common strategic mistake in gin rummy. Going gin earns a 25-point bonus, but knocking with low deadwood is faster and safer. If your opponent knocks first, you lose the round even if you were close to gin. A reliable knock with 3 or 4 deadwood beats a failed gin attempt most of the time.
- Which cards should I discard first?
- High-value unconnected cards — face cards and tens — should go first. They cost 10 points each in deadwood, and if your opponent knocks before you, that deadwood directly reduces your score. Middle cards like 5, 6, 7, and 8 are worth keeping longer because they connect to more possible runs.
- How do I know when it is safe to draw from the discard pile?
- Draw from the discard pile only when the card completes or directly extends a meld. The card you take is visible to your opponent, so you are revealing exactly what you are building. If the pickup only reduces your deadwood by a few points without forming a meld, take from the stock instead — the information you give away is not worth it.
- What is an undercut and how do I avoid being undercut?
- An undercut happens when you knock and your opponent's deadwood is equal to or less than yours. Your opponent wins the round and earns a 25-point bonus. To avoid it, only knock when your deadwood is genuinely low — ideally 5 or less — and remember that your opponent can lay off cards onto your melds before the comparison, which may reduce their deadwood further than you expect.
- When should I hold a partial meld vs discard it?
- Hold a partial meld when it is one card away from completing or when the cards have low deadwood value. Discard it when the cards are high-value, when you have drawn multiple times without completing it, or when you already have a stronger partial meld to develop. Do not cling to a partial meld that is keeping your deadwood high.
- How important is it to track the discard pile?
- Tracking the discard pile is one of the highest-value habits in gin rummy. The cards your opponent discards tell you what they do not need — which makes those cards relatively safe to discard yourself. The cards they pick up tell you what they are building — making nearby cards dangerous to hold and suicidal to discard.