10 Gin Rummy Tips for Beginners
10 Gin Rummy Tips for Beginners
A gin rummy hand can look chaotic when you first pick it up. Ten cards, two decisions per turn, and an opponent drawing toward their own hand at the same time. The structure beneath that chaos is learnable — and each of these tips gives you something concrete to do on your very next turn.
Work through them in order the first time. Within a few sessions, most will become automatic.
1. Sort Your Hand Immediately
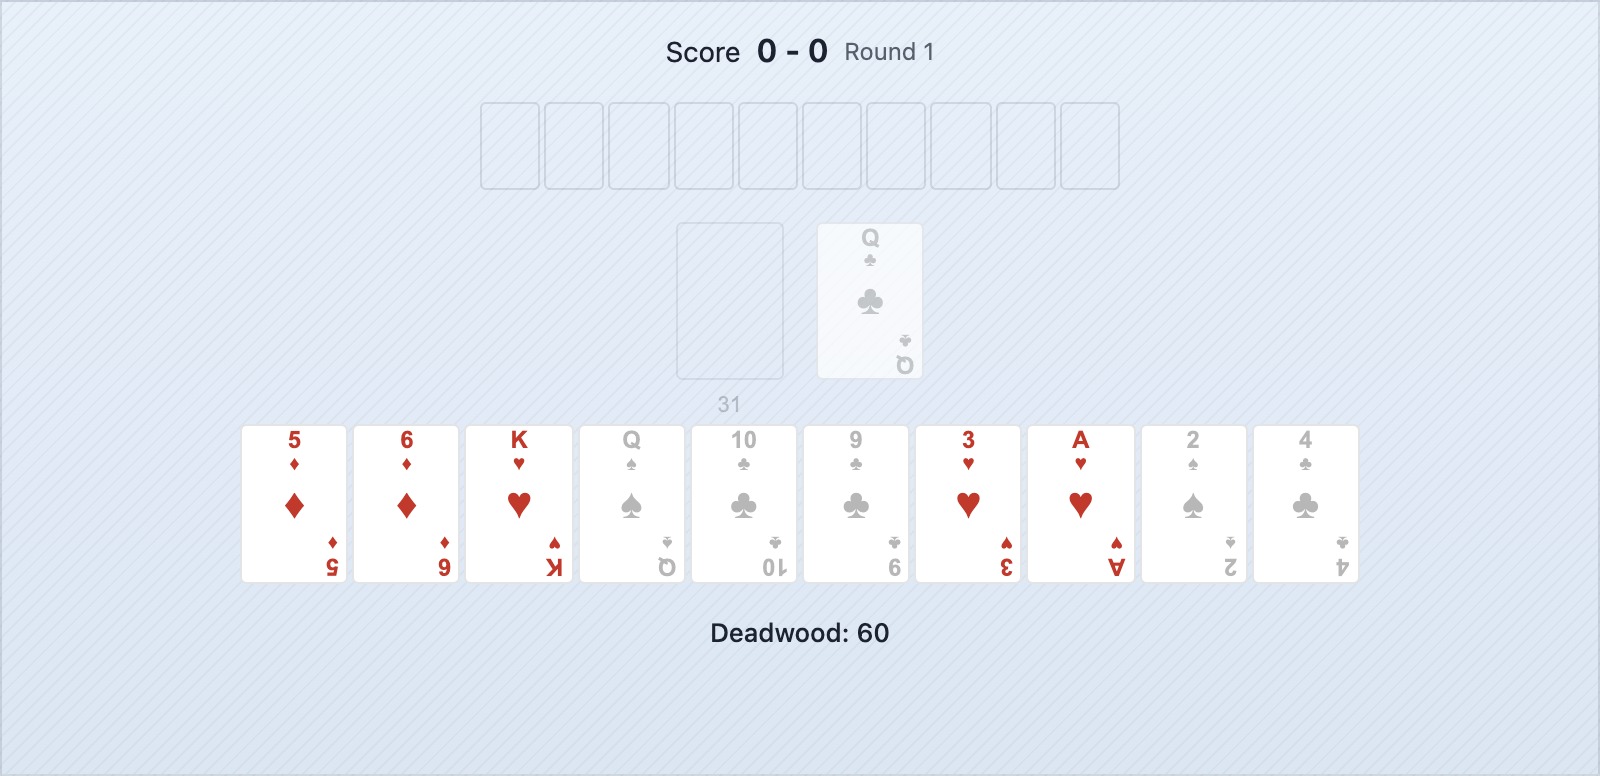
When you receive your ten cards, organise them before drawing or discarding anything. Group completed melds together, then partial melds, then isolated cards — sorted by value within each group.
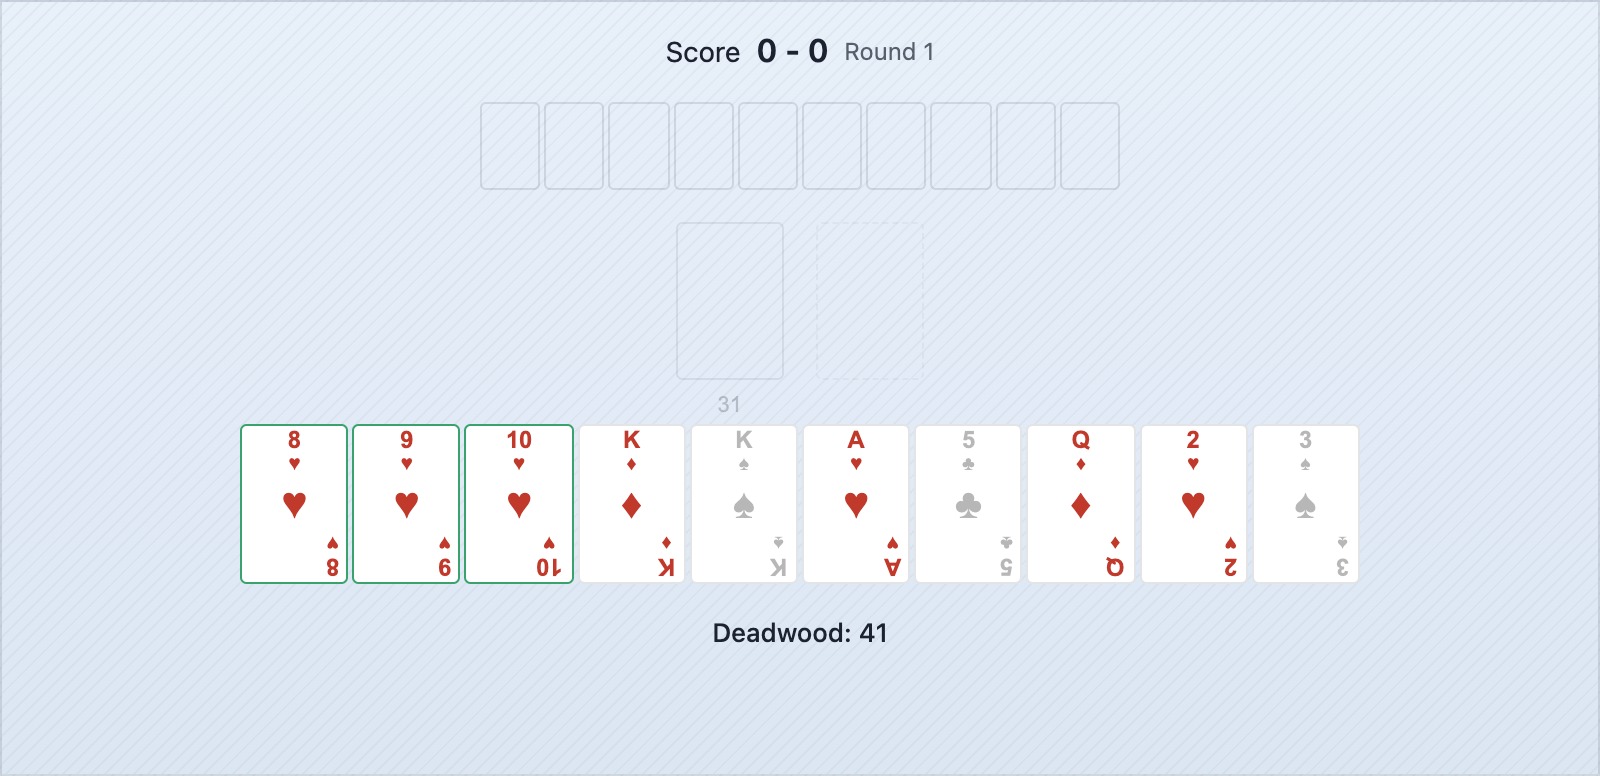
The run 8-9-10 of Hearts is complete. The pair of Kings is a partial meld one draw from completion. The remaining five cards are isolated deadwood. Seeing this structure clearly at the start of the round tells you exactly which cards to hold and which to discard.
Sorting takes ten seconds and prevents the most common beginner mistake: accidentally discarding a card that completes a partial meld you forgot you had.
2. Discard High-Value Deadwood First
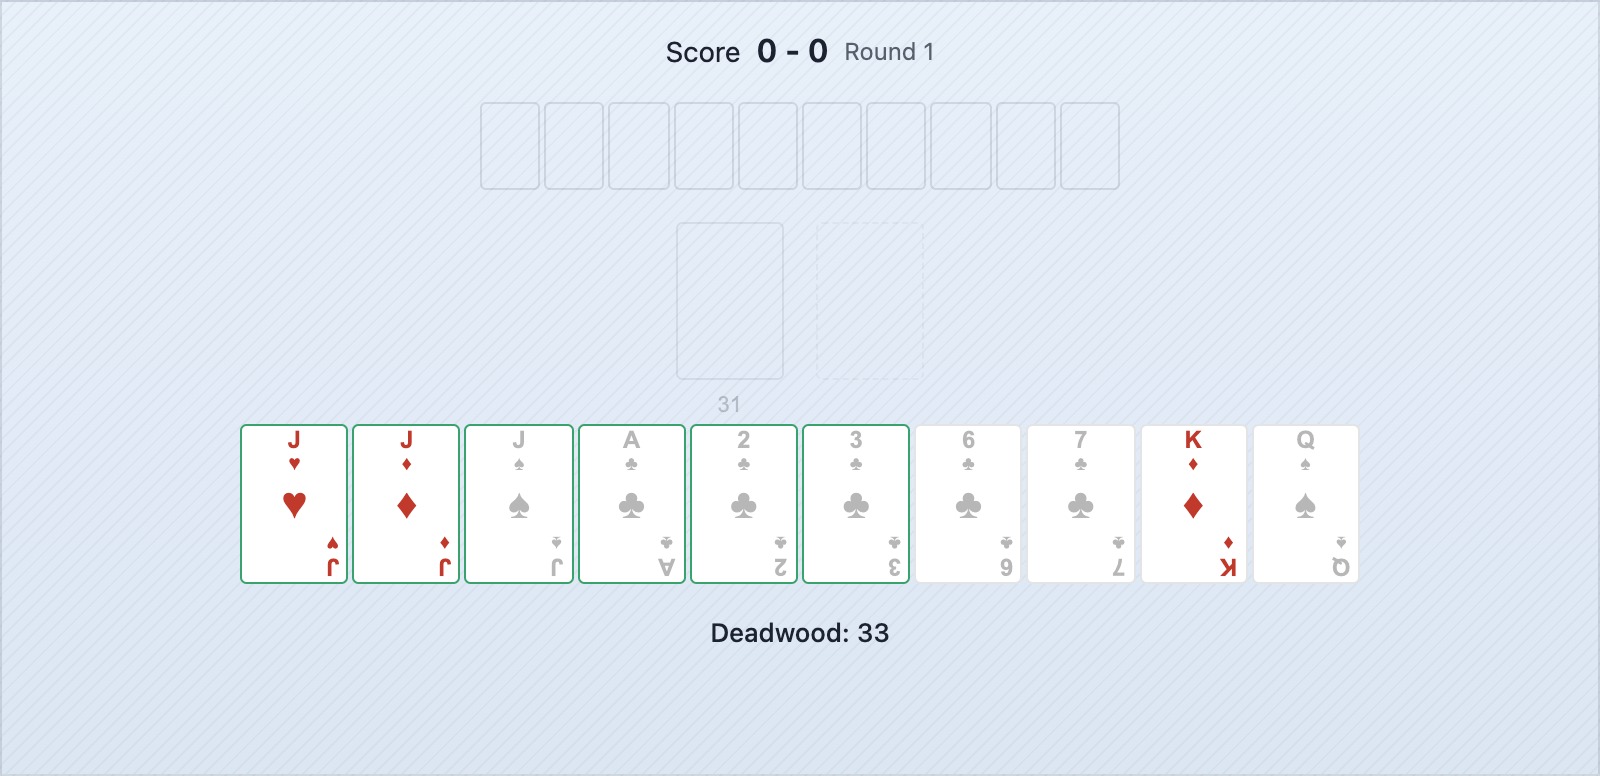
Face cards (Jack, Queen, King) and 10s each cost 10 deadwood points. Three unconnected face cards in your hand means 30 points at risk if your opponent knocks before you do.
The run is complete. The pair of Fives is developing. But the King, Queen, and Jack are isolated and expensive. Each one leaves the hand as the first priority — not after the partial meld stalls, not later. First.
Prioritise discarding by deadwood cost. An Ace costs 1 point. A King costs 10. Do not discard an Ace to keep a King unless the King is part of a strong partial meld.
3. Keep Flexible Middle Cards
Middle-rank cards — 5, 6, 7, 8 — can form runs in more directions than edge cards. A 7 can be the start, middle, or end of a run. A King can only be the end.
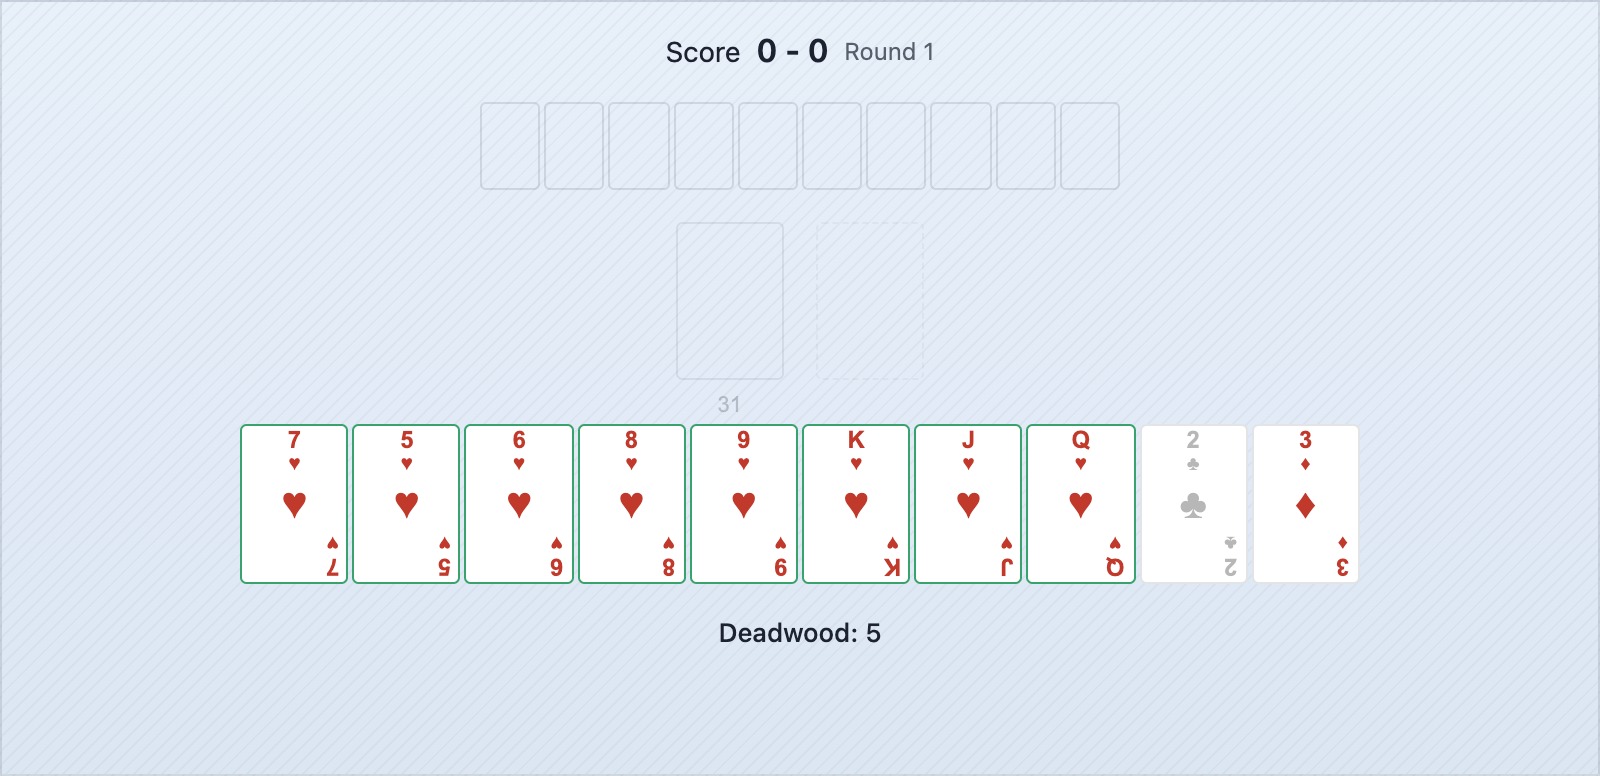
The 7 of Hearts connects to three separate runs already visible in hand. The King of Hearts has only one possible run completion. When you must discard a partial meld, the King-Queen pair is a weaker hold than anything built around a middle card.
When evaluating which partial meld to develop, choose the one with more completion paths. Two partial melds of equal deadwood cost should be resolved in favour of the one built on middle ranks.
4. Watch What Your Opponent Discards
Every card your opponent throws away is information. They do not need that rank or suit — at least not right now.
The opponent has discarded four high-value cards in a row. They are building low melds and have no interest in Kings or Queens. The King of Diamonds in your deadwood can be discarded safely — your opponent will not pick it up.
Build a rough mental model of your opponent's hand from their discards. Cards they have thrown away are cards they do not want. Those same cards are safe for you to discard.
5. Watch What Your Opponent Picks Up
A discard tells you what they do not need. A pickup tells you exactly what they do need — and what they are building.
The opponent took the 8 of Clubs. They are likely building a Clubs run. The 6 and 7 of Clubs in your hand are now dangerous discards — throwing either would hand your opponent a completed meld. Find an alternative discard.
After any opponent pickup, mentally flag the adjacent cards in your hand as dangerous. Do not discard them until you see evidence the meld has been completed or the opponent has moved on.
6. Knock Early at Low Deadwood
The knock threshold is 10 deadwood points. Most beginners wait too long. The correct habit is to knock as soon as your deadwood reaches 5 or less.
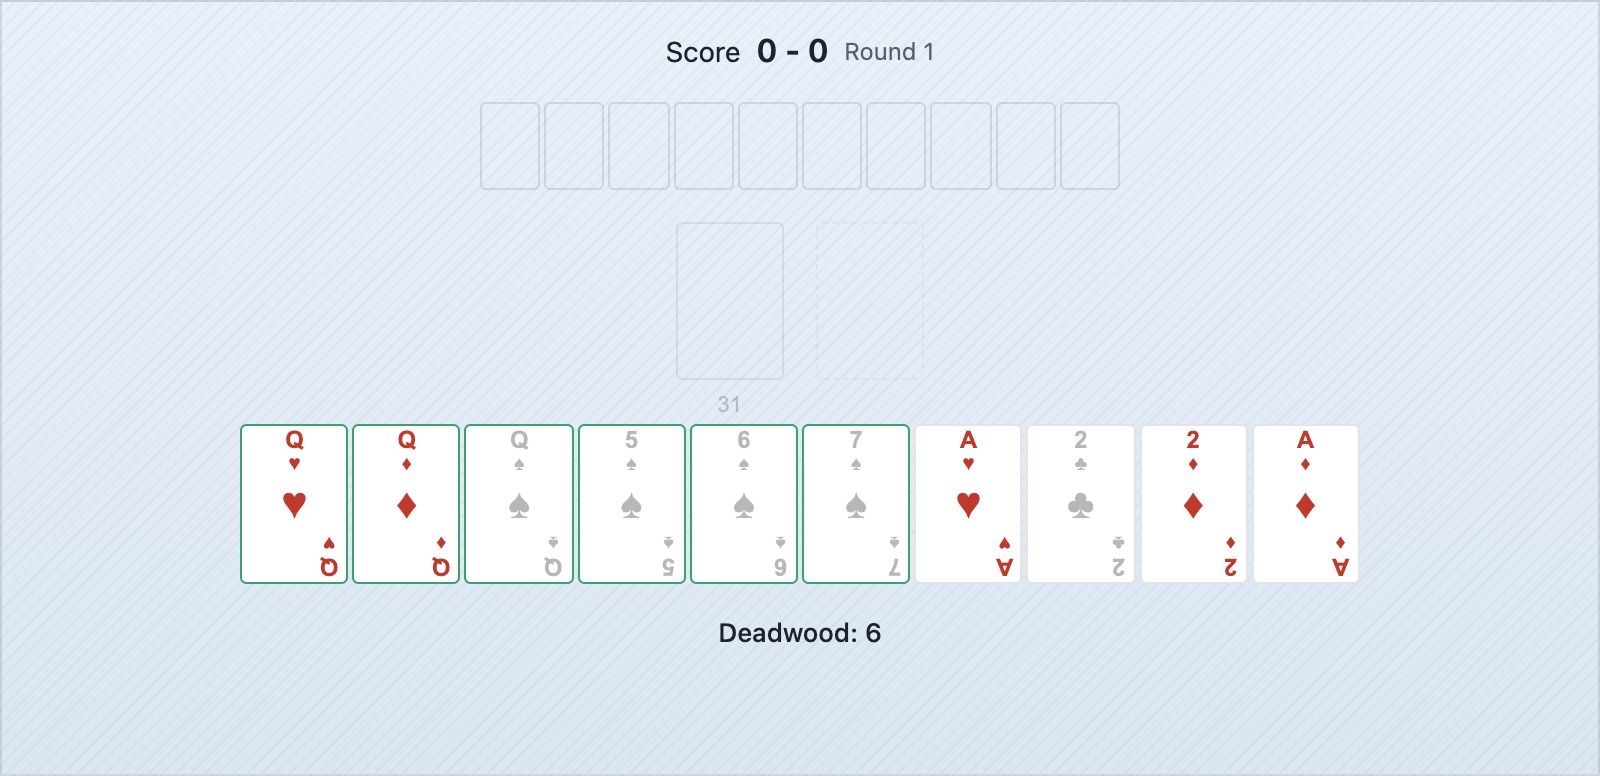
Two melds complete, 6 deadwood. Discard one Ace to reach 5 and knock. The gin bonus for waiting is 25 points — but the risk of your opponent knocking first while you draw toward zero is high. Take the round.
At 5 or less deadwood, your opponent is very unlikely to undercut you even after laying off cards. Waiting for gin from this position is almost always the wrong decision.
7. Be Cautious Drawing From the Discard Pile
When you take a card from the discard pile, your opponent sees which card you took. You have revealed a piece of your hand structure. Only do this when the benefit clearly outweighs the cost.
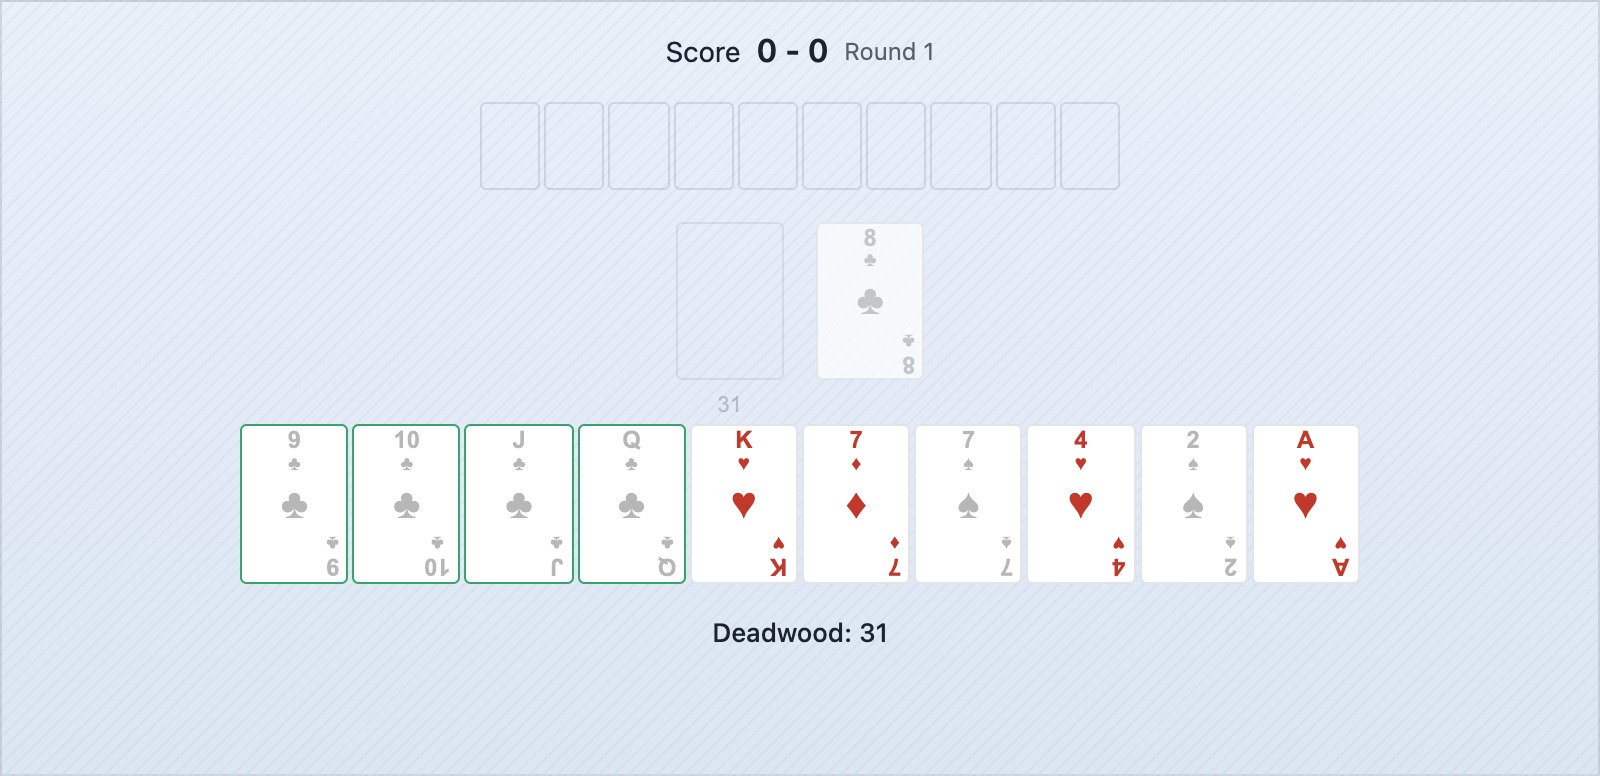
The 8 of Clubs on top of the discard pile completes an 8-9-10 of Clubs run. This is a clear case where the pickup is correct — you gain a complete meld, not just a slight deadwood reduction. Even though your opponent now knows you have a Clubs run, completing a meld is worth it.
The rule: draw from the discard pile if and only if the card completes or extends a meld. Drawing to reduce deadwood by a few points while revealing your strategy is not worth it.
8. Build Multiple Partial Melds
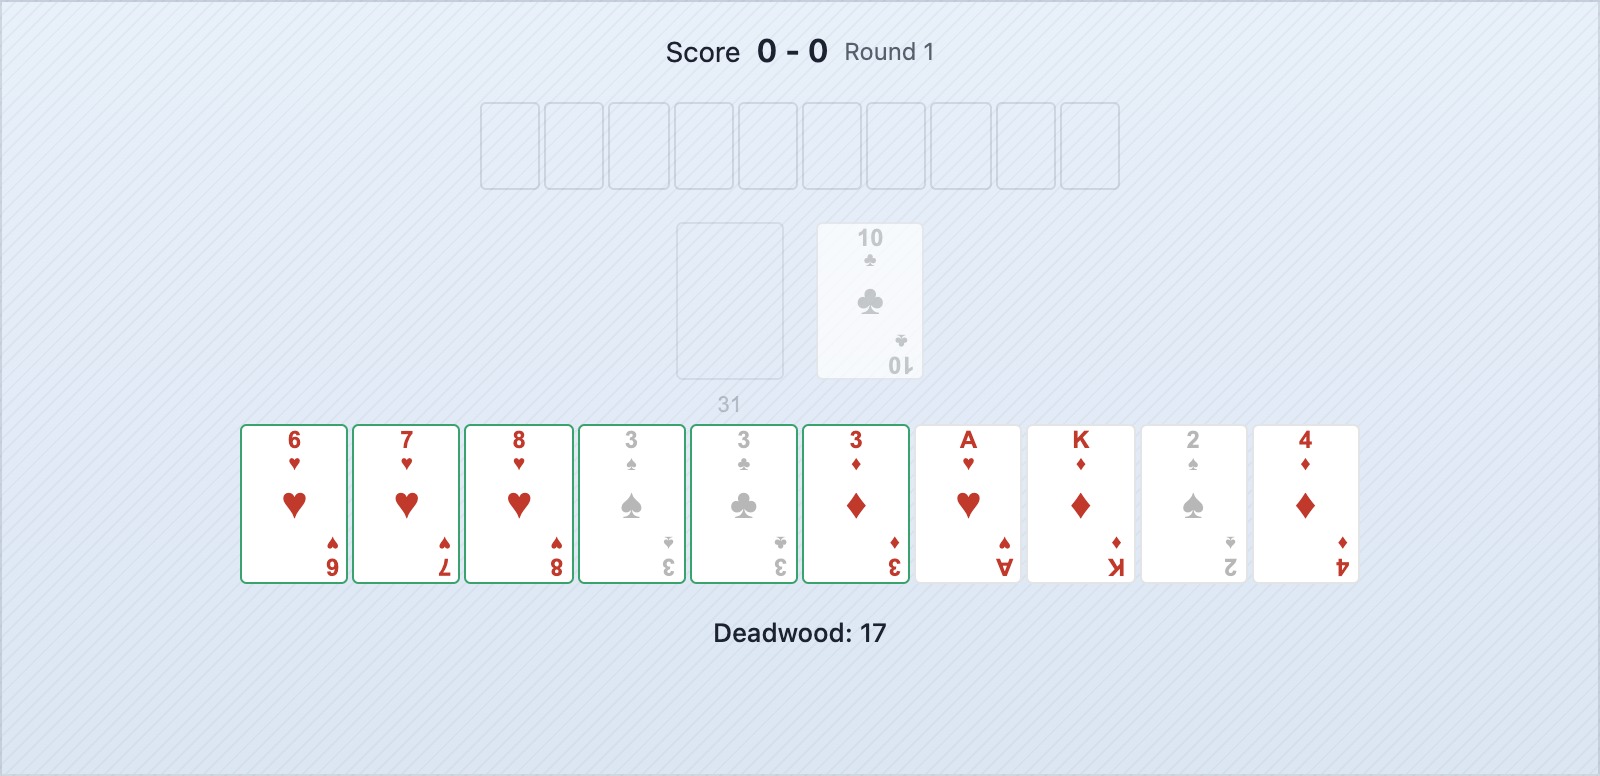
A hand with two partial melds gives you twice as many ways to reduce deadwood. If one partial stalls — the card you need is in the discard pile or your opponent's hand — the other partial can still progress.
Two partial melds are developing: the 9-10 of Hearts needs an 8 or Jack; the pair of Fours needs a third Four. Either completing gives a meld. The King and Queen are isolated deadwood and should leave first while both partials develop in parallel.
Single-partial-meld hands are fragile. If the one card you need is unavailable, you have no fallback. Two partials in progress means your next useful draw is more likely to land.
9. Use Cards in the Discard Pile to Refine Strategy
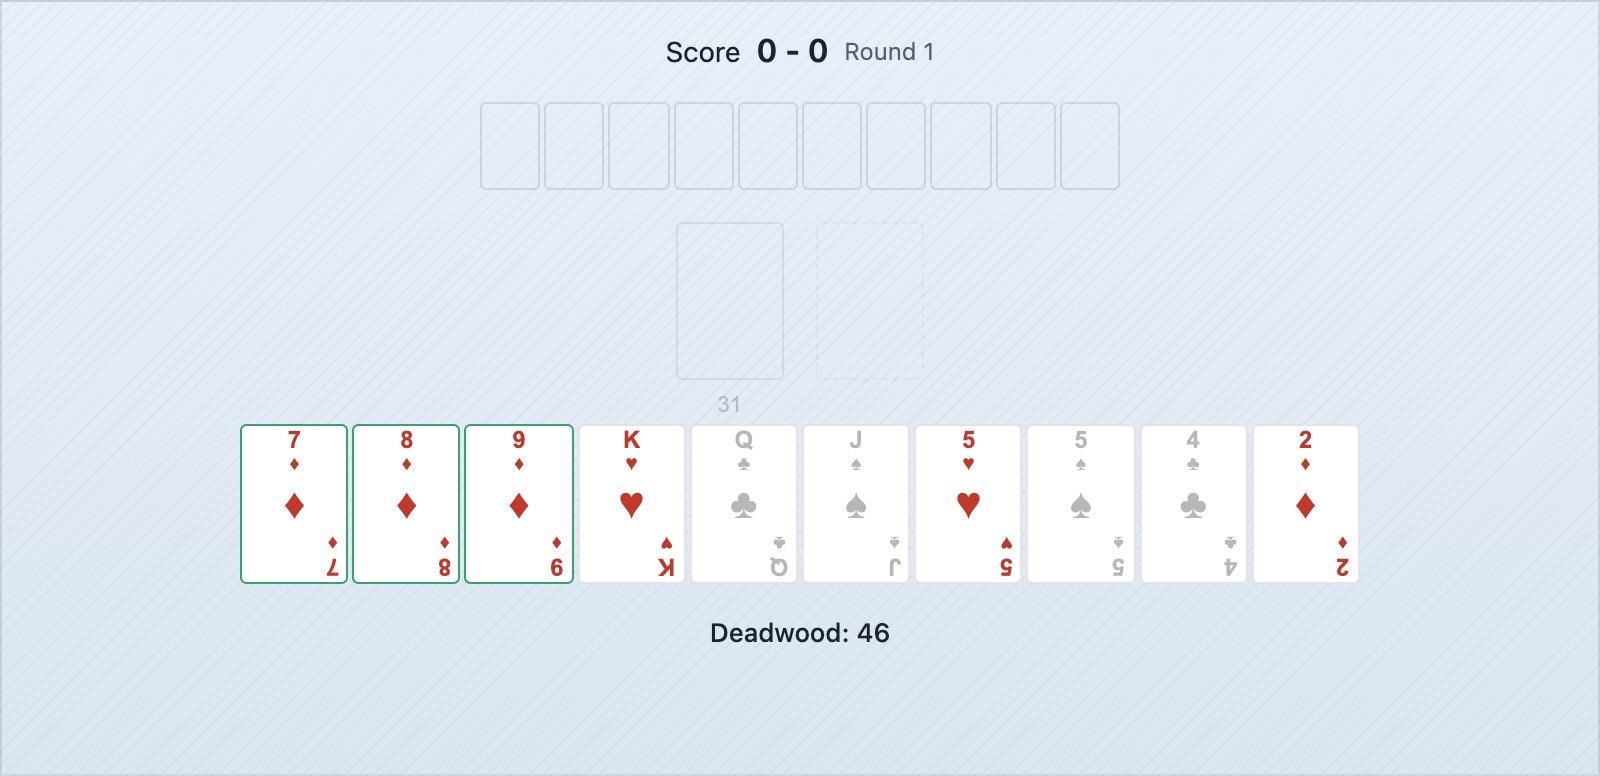
The discard pile is a running record of cards that cannot be drawn from the stock. Use it to decide whether to keep or abandon a partial meld.
The 7 and 8 of Diamonds are visible in the discard pile. The 5-6 of Diamonds can no longer complete a run — both adjacent cards are out. The partial meld is dead. Discard the 6 of Diamonds (higher value) and keep the 5 to see if a pair of Fives develops instead.
Check the discard pile before committing to a partial meld. A partial that needs a card already discarded is not a partial — it is expensive deadwood masquerading as strategy.
10. Know the Undercut Before You Knock
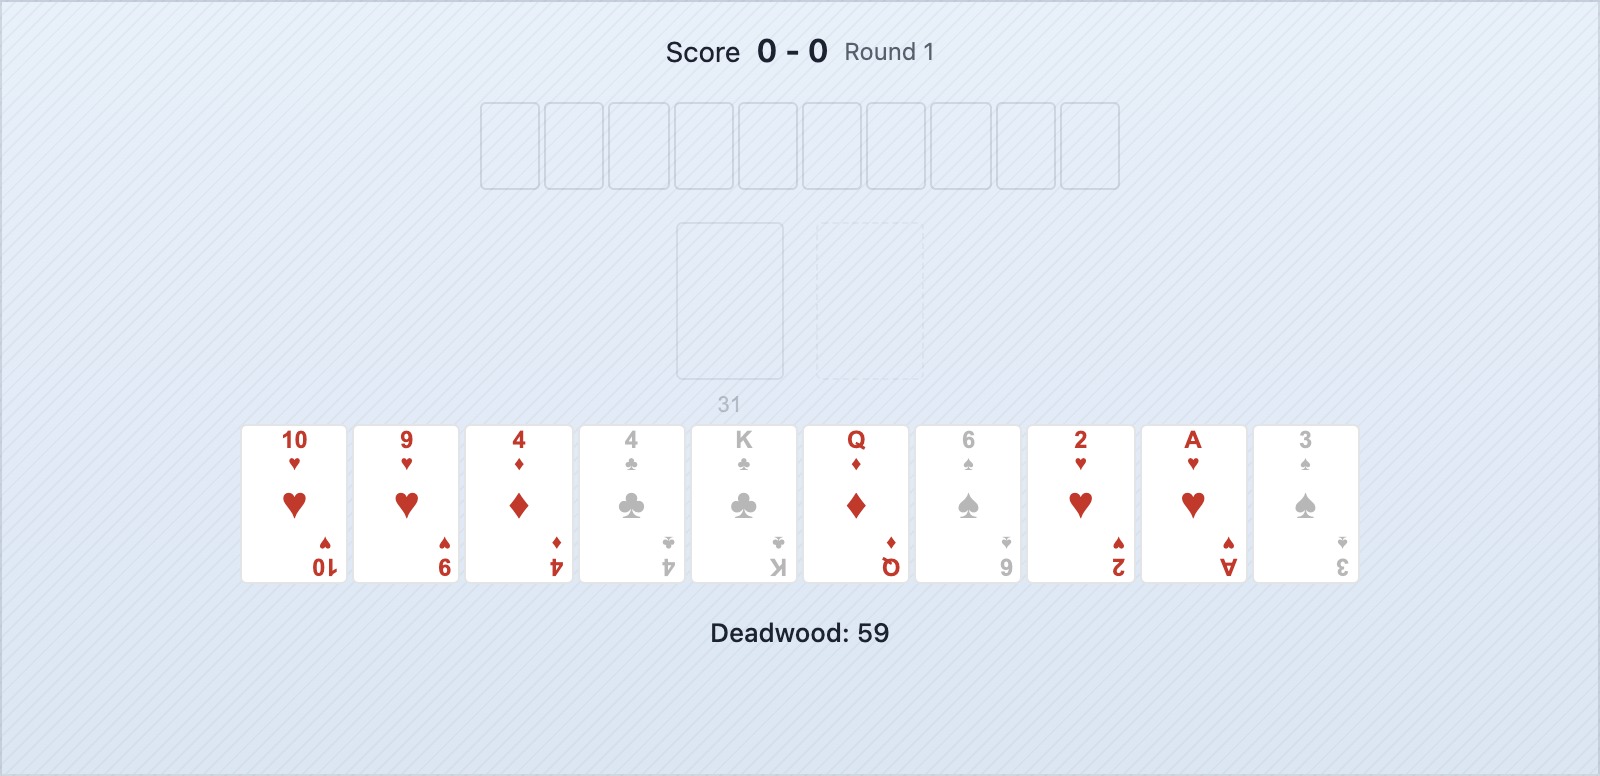
Before knocking, think about what your opponent can lay off onto your melds. Lay-offs reduce their deadwood — and if they reduce it below yours, you are undercut.
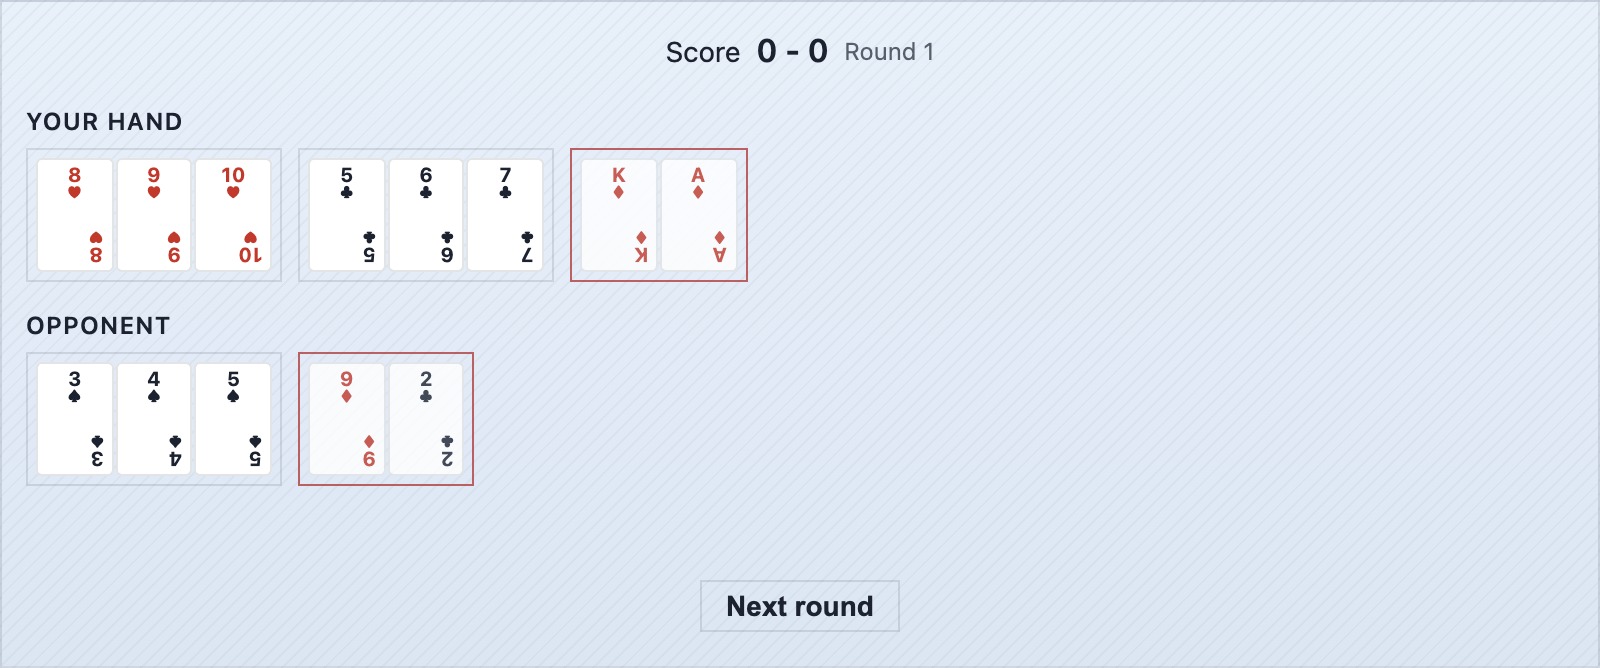
The knocker holds 11 deadwood. The opponent lays the Jack of Hearts onto the 8-9-10 run and the 7 of Hearts... wait — that's already in the run. But if the opponent can lay off two cards reducing to equal or less deadwood, they undercut. Knocking at 11 with melds open to lay-offs is the mistake. Knock at 5 or less.
The checklist before knocking:
- Is your deadwood 5 or less?
- Do your melds have open ends that an opponent could extend?
- Roughly how low might your opponent's deadwood be based on their discards and draws?
If any answer is uncertain at 8–10 deadwood, keep drawing.
Put the Tips Together
None of these tips works in isolation. The cleanest gin rummy players sort early, discard high cards first, read opponent behaviour, build multiple partials, and knock without hesitation when the deadwood is low.
The fastest way to internalise them is to play. Play Gin Rummy on Playboard — start a game against a bot, pick one tip per round to focus on, and build from there.
Frequently Asked Questions
- What is the single most important habit to build in gin rummy?
- Discarding high-value unconnected cards immediately. Face cards and tens each cost 10 deadwood points. Holding them while waiting for a meld to develop is the most common reason beginners lose rounds they should have won — their opponent knocks first while they are still carrying 20 or 30 points of expensive deadwood.
- When should I knock vs wait for gin?
- Knock when your deadwood is 5 or less. The 25-point gin bonus is appealing, but waiting for gin means passing multiple knocking opportunities, and your opponent may knock first. A knock at 3 deadwood earns you the point difference every round. Gin is best pursued when you only need one specific card and the round is still early.
- Is it ever a mistake to draw from the discard pile?
- Yes. Every card you take from the discard pile is visible to your opponent — you reveal exactly which card you wanted. Only draw from the discard pile when the card completes or directly extends a meld. Taking a card just because it slightly reduces your deadwood gives your opponent information about your hand without enough benefit.
- How do I use what my opponent discards?
- Treat opponent discards as a list of cards they do not need. Cards your opponent has discarded are safe for you to discard yourself — they will not pick them up. Build a rough mental picture of what they are holding versus not holding, and use it to guide both your discards and your assessment of which cards are still available in the stock.
- What does it mean to undercut someone?
- An undercut happens when you knock and your opponent ends up with equal or lower deadwood than you after laying off cards onto your melds. They win the round and receive a 25-point bonus. The best way to avoid being undercut is to knock only when your deadwood is genuinely low — 5 or less — so your opponent cannot catch you even with good lay-offs.
- How do I choose which partial meld to develop?
- Prefer partial melds built around middle-rank cards (5, 6, 7, 8). These cards can form runs in multiple directions — a 7 can join 5-6, 6-8, or 8-9 — giving you more paths to complete the meld. High-card partials (King-Queen, Queen-Jack) are expensive in deadwood if they stall and have fewer completion paths.