10 Battleship Tips for Beginners
10 Battleship Tips for Beginners
Battleship rewards systematic thinking. Each shot is a yes-or-no question: is a ship here? The player who asks the right questions in the right order wins. These ten tips give you the specific habits that turn random firing into a disciplined, deduction-based search.
Work through them in order the first time. By your tenth game, most will be automatic.
1. Always Start With a Checkerboard Pattern
In hunt mode — when you have no open hit to follow up — never fire randomly. Fire in a checkerboard pattern.
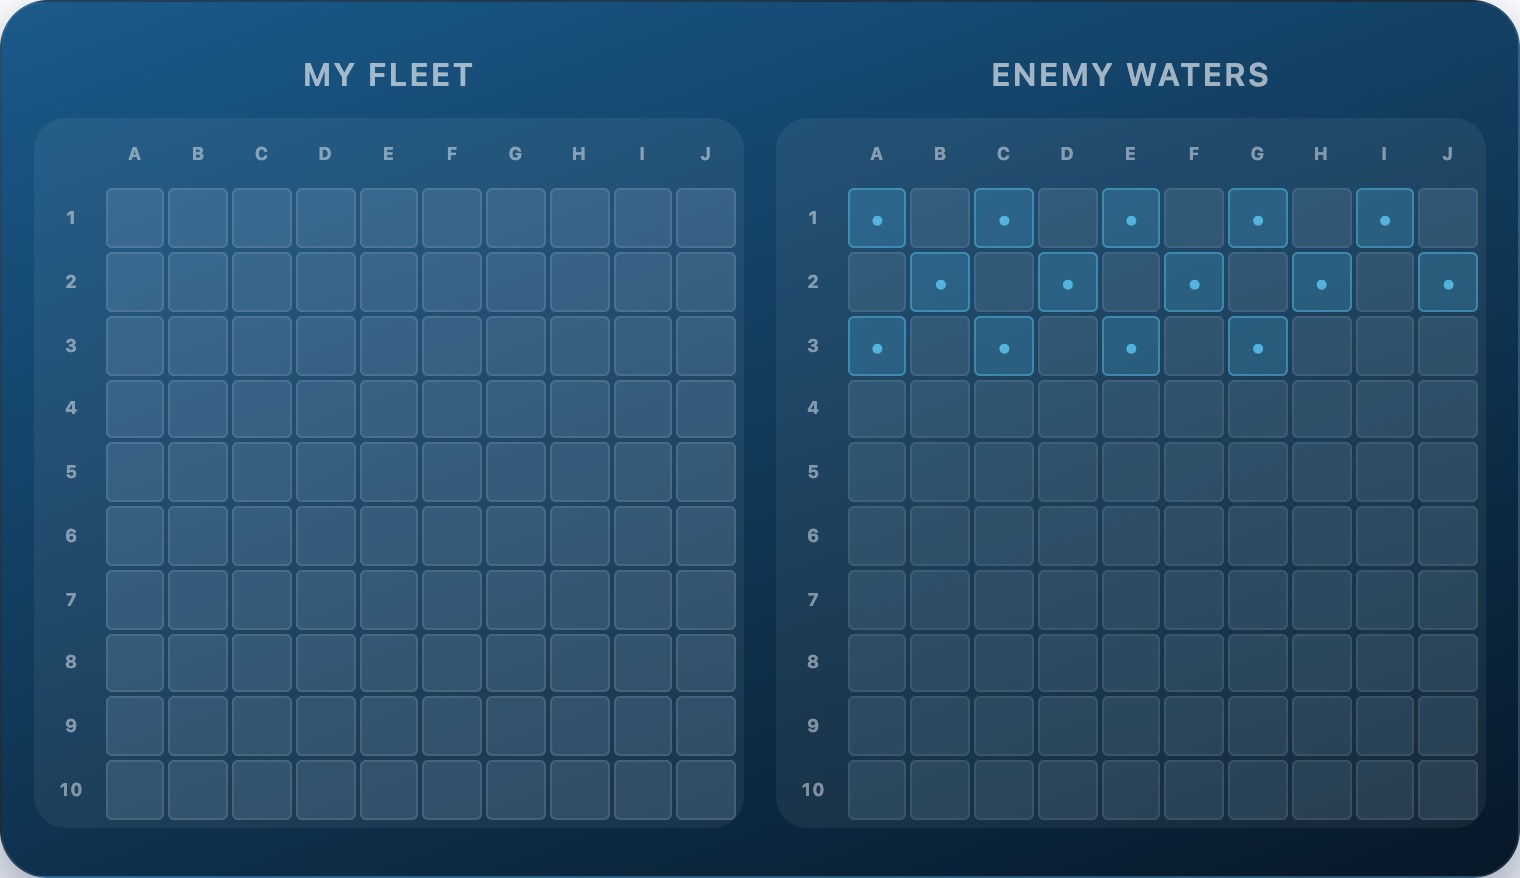
Rows A and B fully covered in checkerboard, row C underway. No ship can hide from this pattern — even the 2-cell Destroyer must occupy at least one of the targeted cells. Compare this to 14 random shots, which might cluster and leave large areas unchecked.
The rule is simple: before any hit, your next shot should always be the next cell in your checkerboard sequence. Pick a starting cell (A1 is conventional) and work row by row.
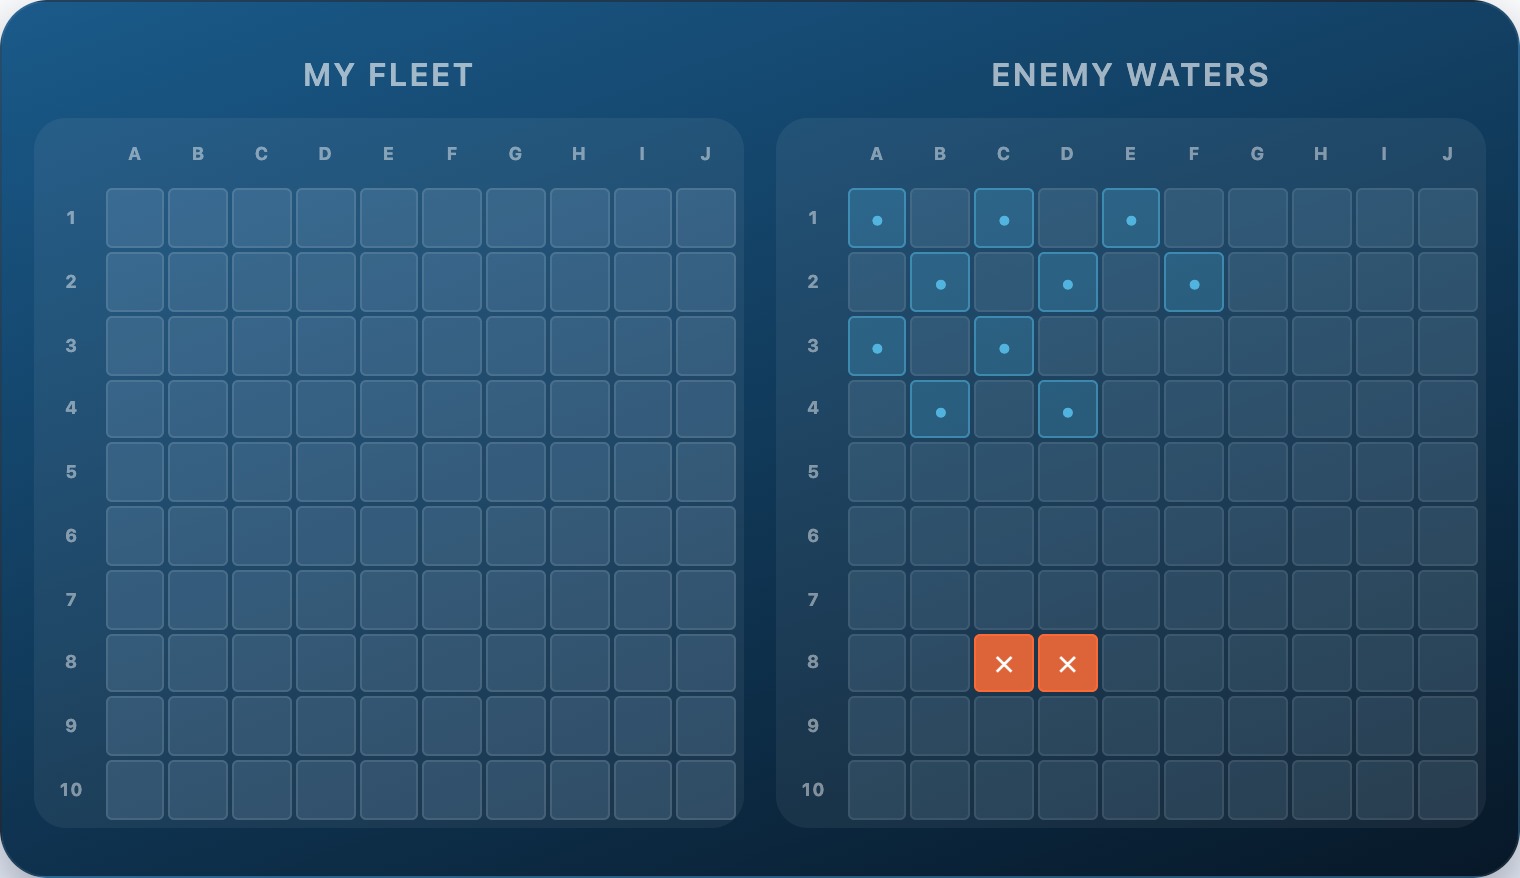
2. Switch to Target Mode the Moment You Get a Hit
The instant you score a hit, stop the hunt pattern. Your sole objective becomes sinking that specific ship.
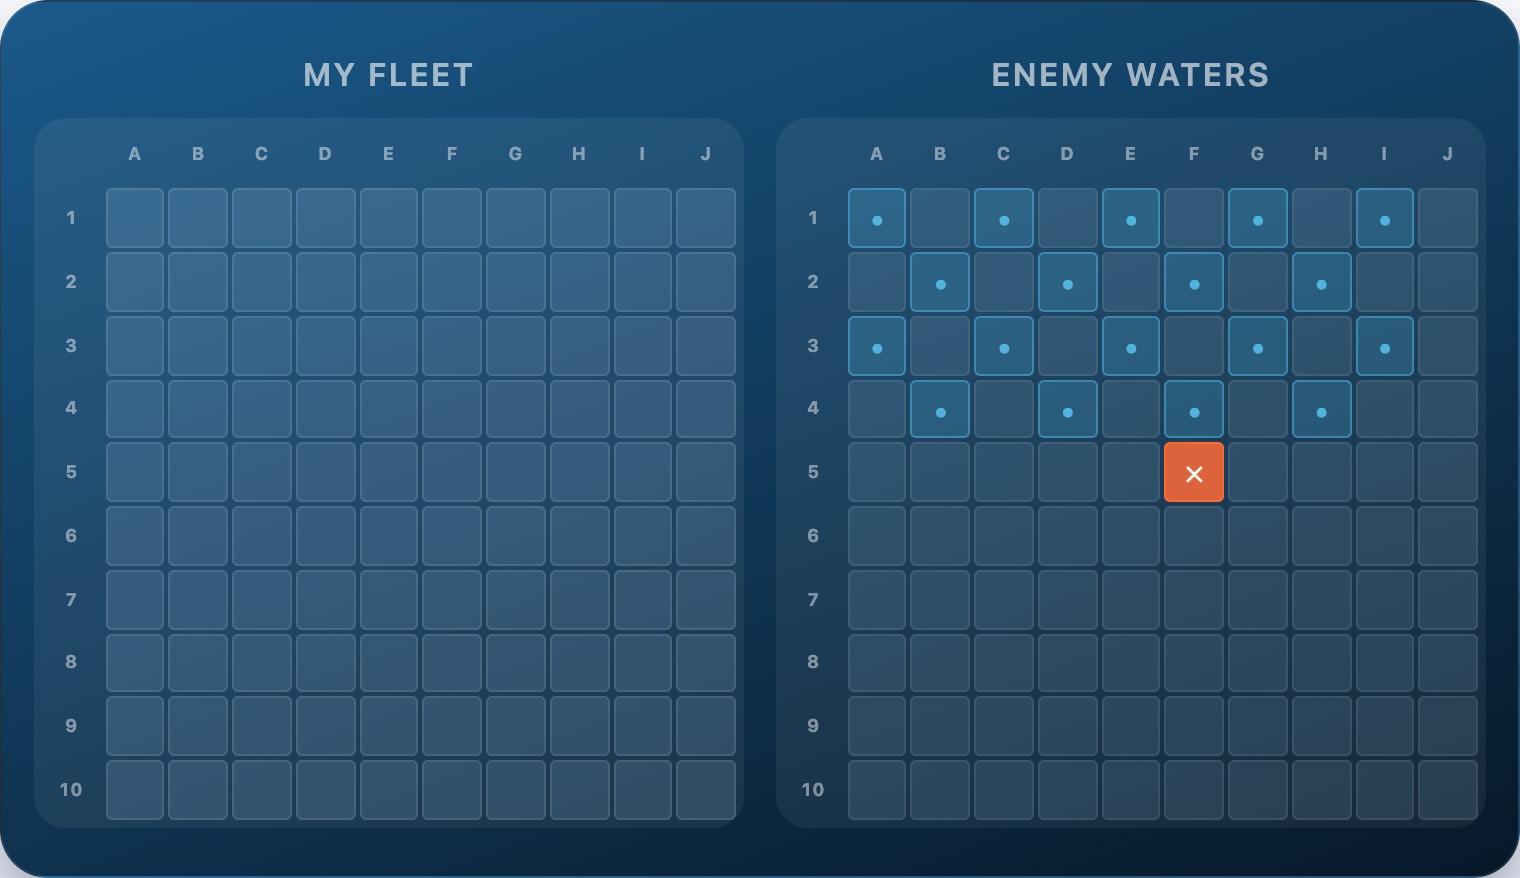
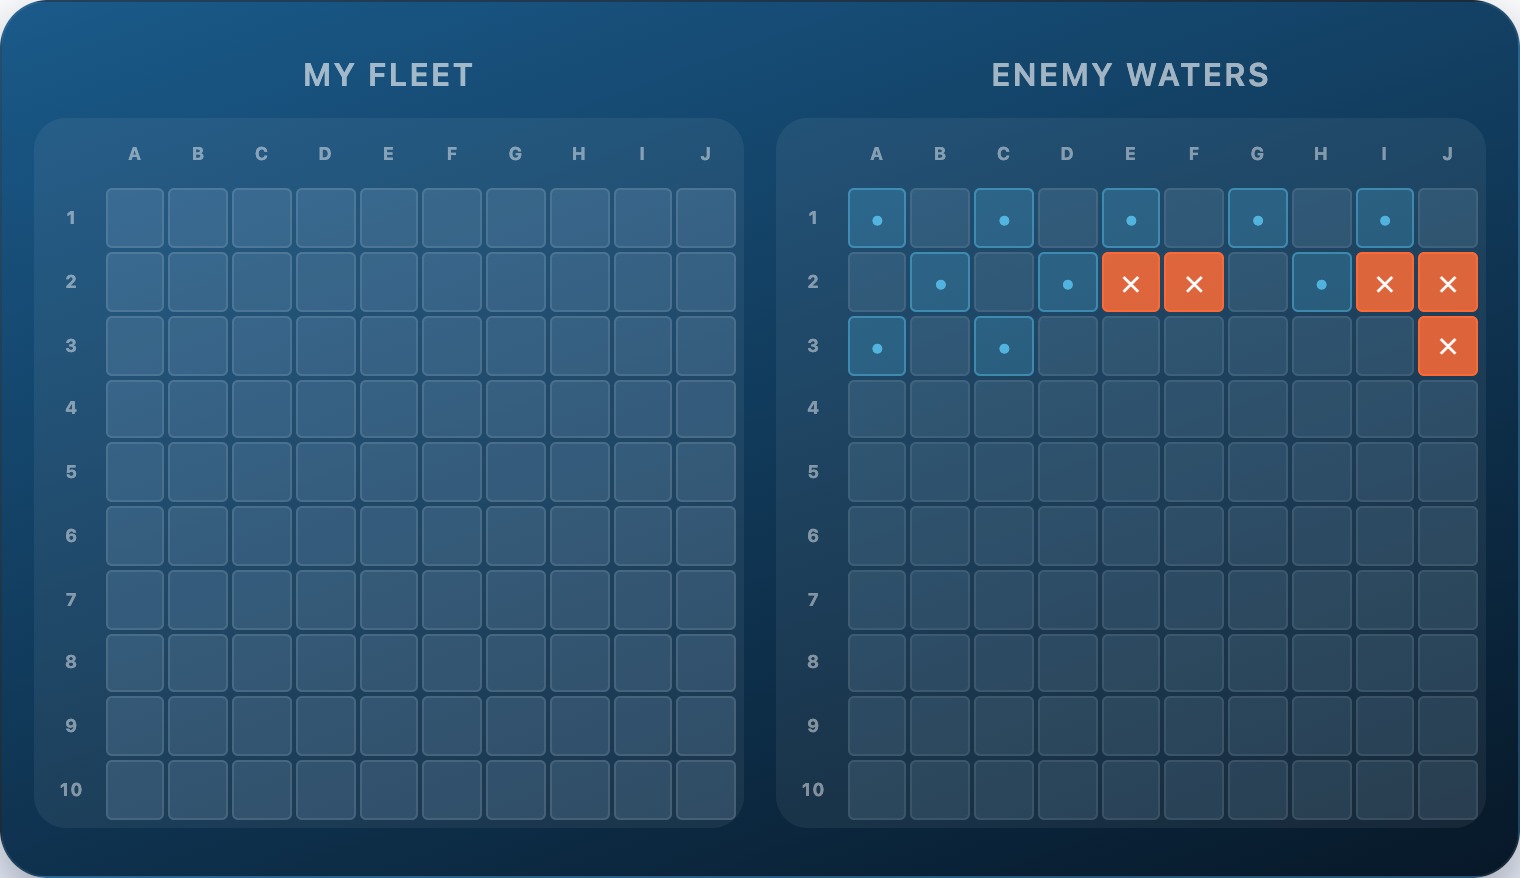
Hit at E6 after a systematic hunt through rows A-D. The hunt pattern stops here. The four adjacent cells — D6, F6, E5, E7 — are the only relevant next shots. Fire one of them and work from the result.
Beginners often score a hit, fire one adjacent cell, miss, and return to the hunt pattern. That hit is left open and the information wasted. The correct behaviour: stay in target mode until the ship is sunk, no matter how many turns it takes.
3. After Two Consecutive Hits, Lock the Axis
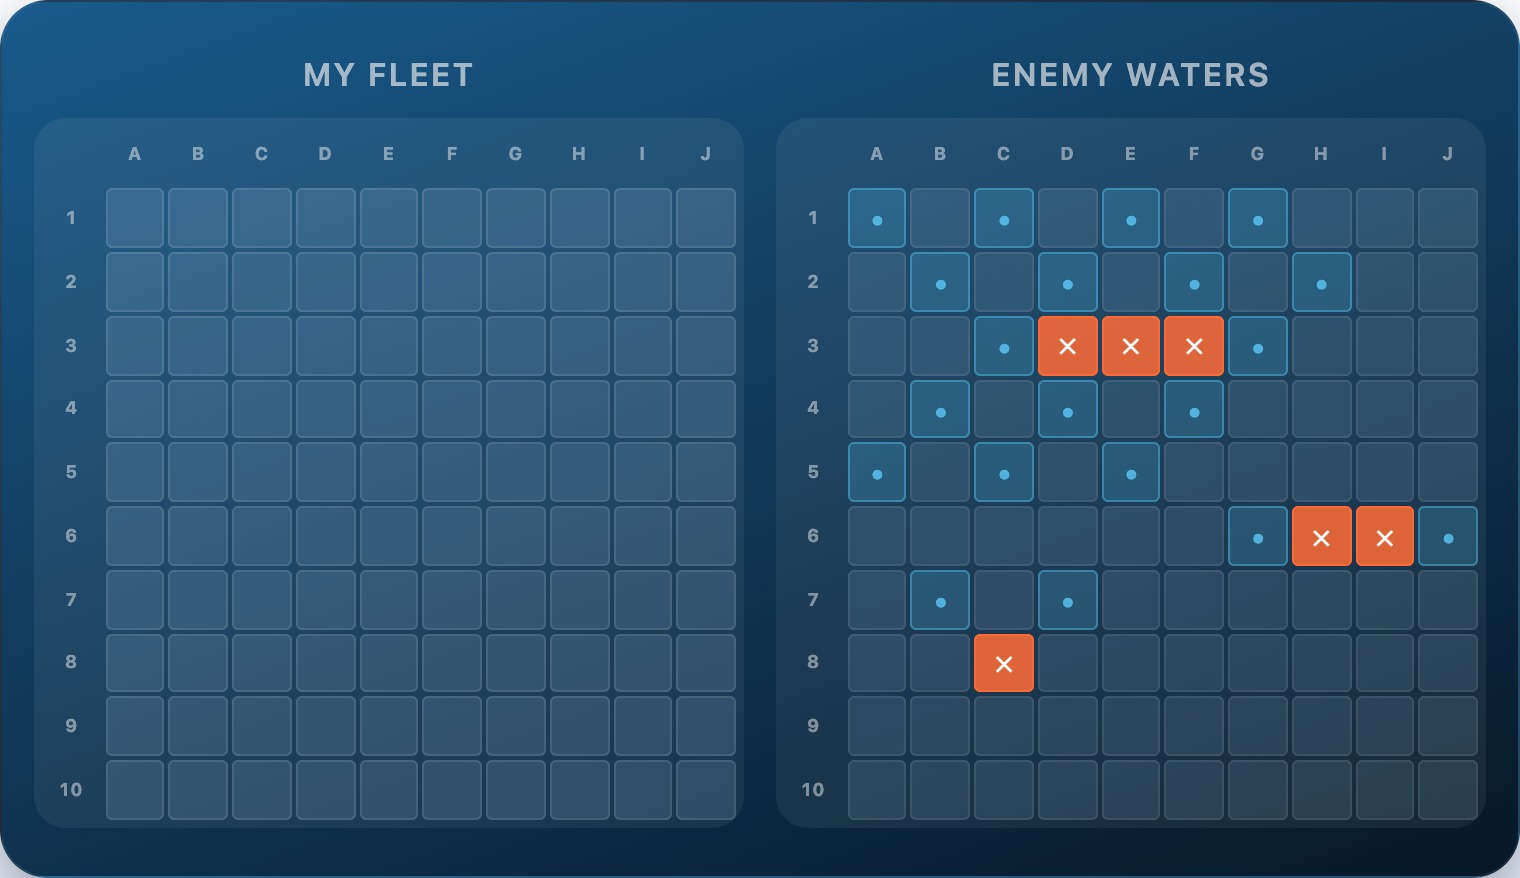
Two hits that share a row confirm the ship is horizontal. Two hits that share a column confirm it is vertical. Once you know the axis, stop firing perpendicular to it.
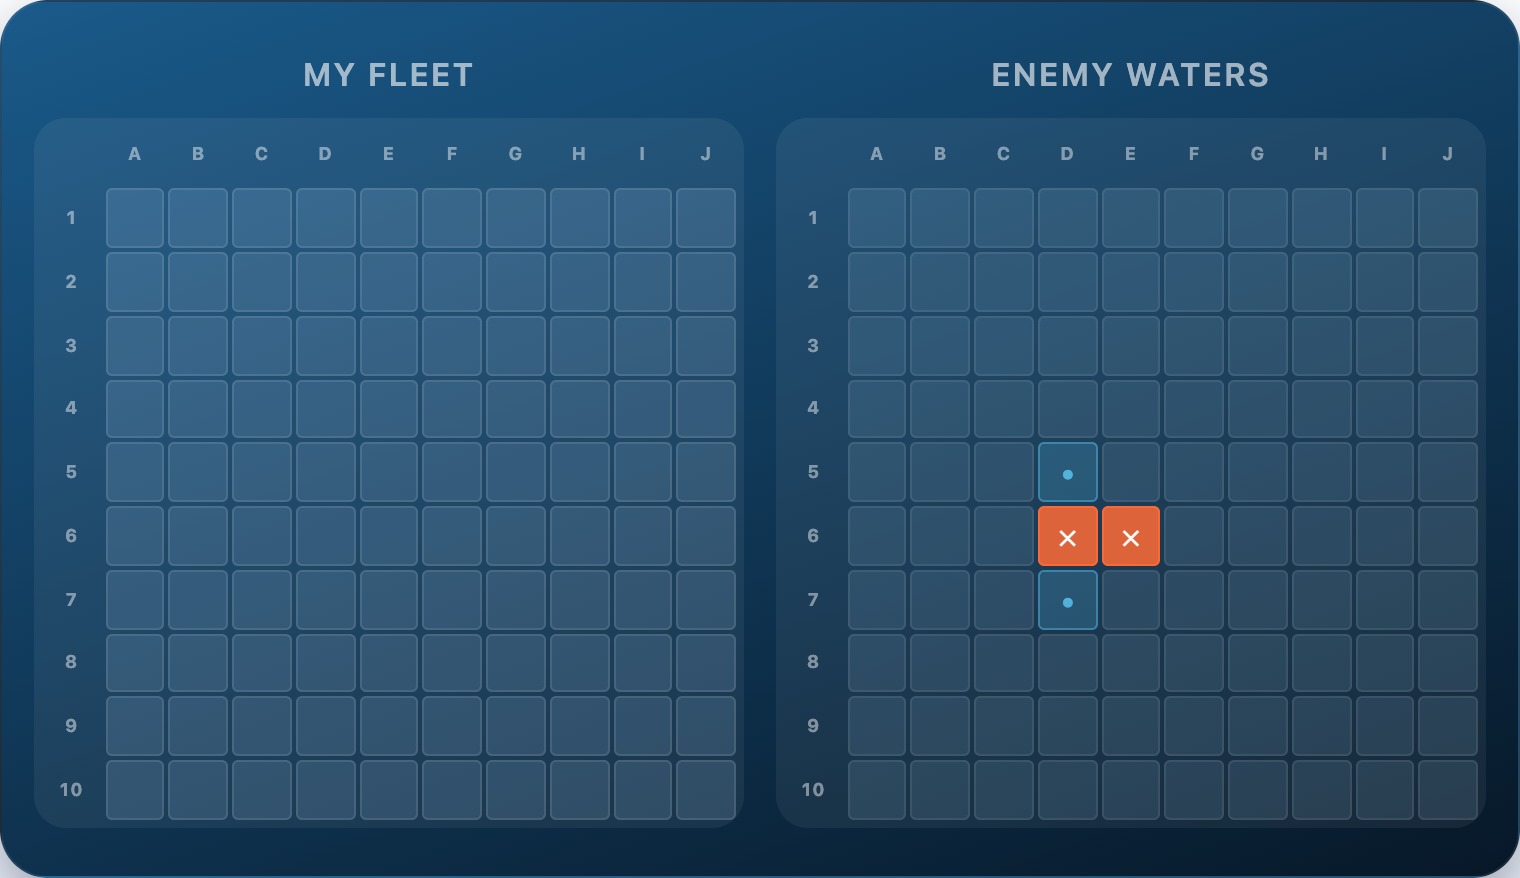
Two hits at F4 and F5, both in row F. The ship is horizontal. Shots at E4 and G4 already confirmed no vertical extent. Firing at E5 or G5 now would be wasted — the ship cannot extend there. Only F3 and F6 are worth firing.
Axis locking eliminates 2 of the 4 remaining neighbour shots immediately, reducing the average shots needed to sink each ship substantially over a full game.
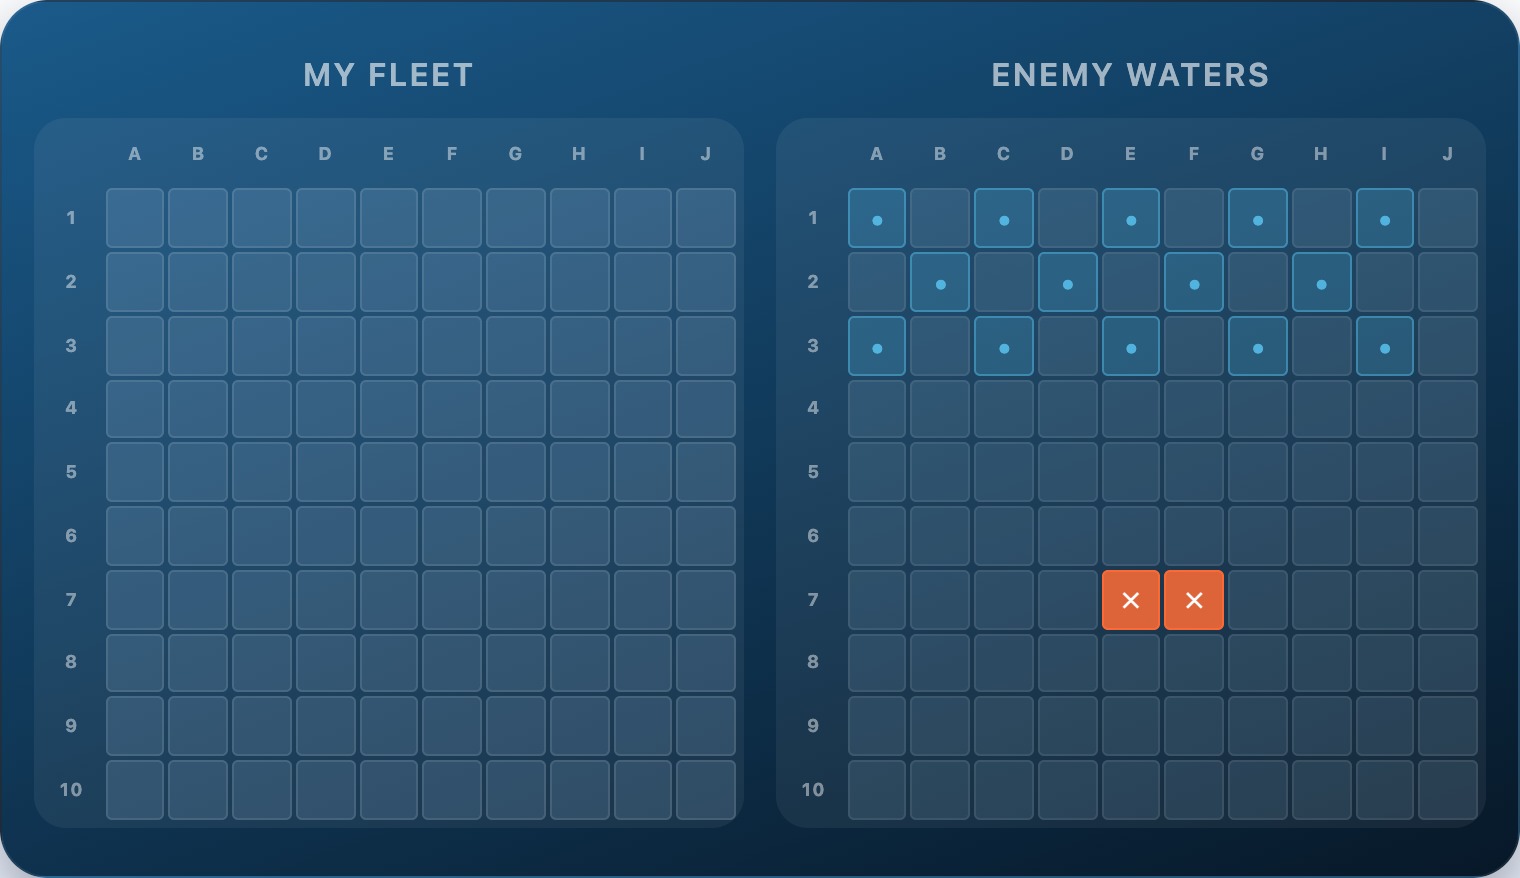
4. Count Hits to Know When a Ship Is Sunk
Each ship has a fixed length. Once you have scored consecutive hits equalling that length, the ship is sunk — stop firing along that axis.
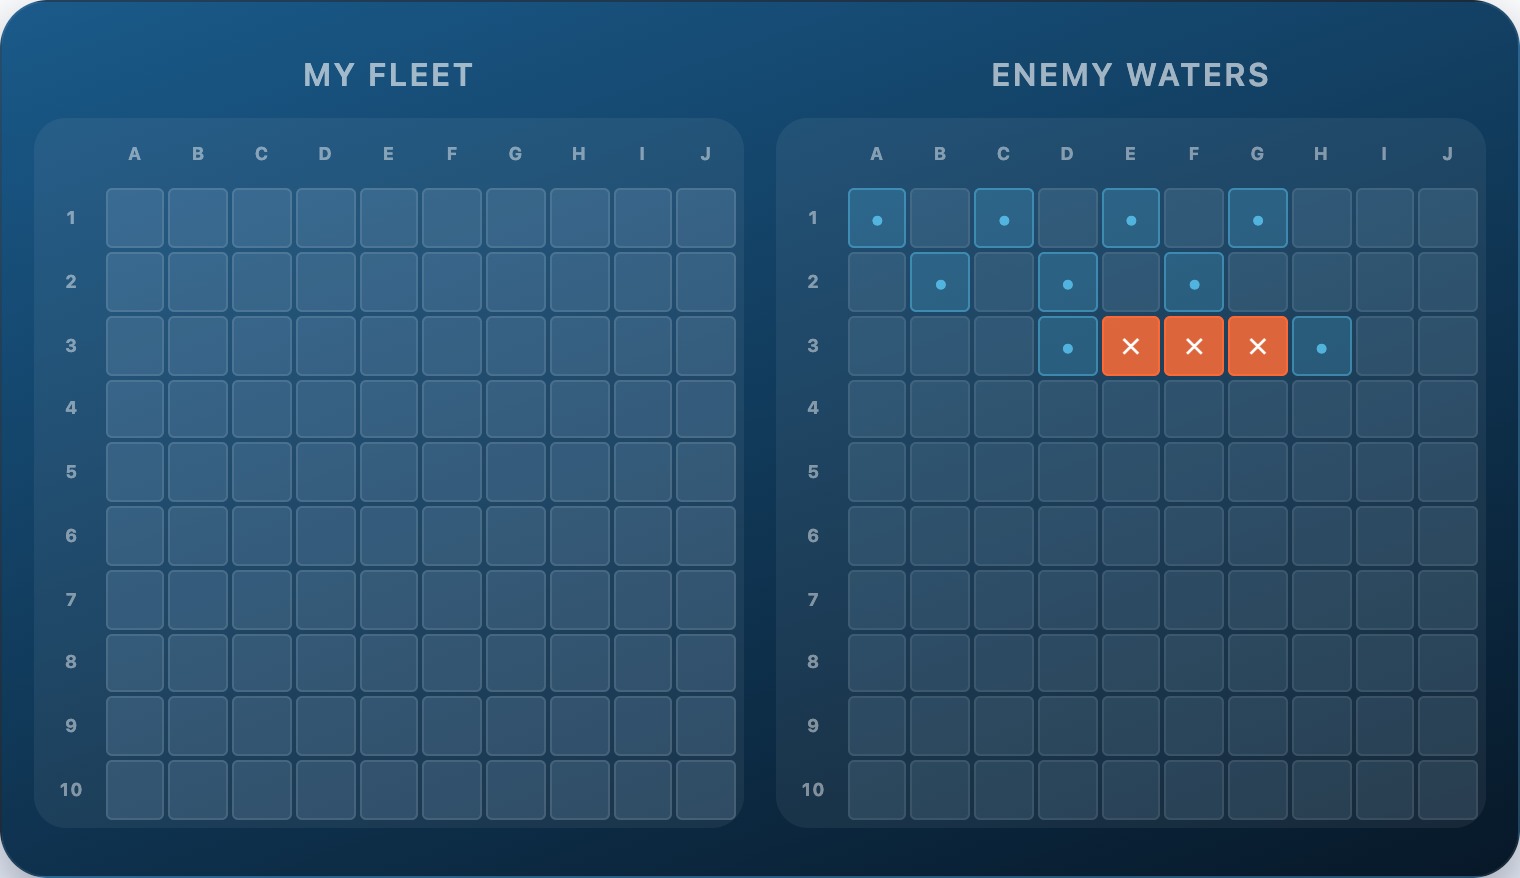
Three consecutive hits at C5-C6-C7, bounded by misses at C4 and C8. The Cruiser (3 cells) is announced as sunk. Hunt mode resumes. The remaining ships — Carrier (5), Battleship (4), Submarine (3), Destroyer (2) — are still hidden.
The fleet sizes to remember: Carrier 5, Battleship 4, Cruiser 3, Submarine 3, Destroyer 2. When your hit count matches a remaining ship's length, stop and return to hunt.
5. Eliminate Adjacent Cells After Sinking a Ship
Ships cannot touch each other. When a ship is sunk, every cell adjacent to its hull — including diagonals — is guaranteed empty. Strike these cells from your hunt list.
Destroyer sunk at H3-H4. The ten cells immediately surrounding it (including diagonals) are now guaranteed empty — no ship can be placed touching another. Removing them from the hunt saves up to 10 future shots.
This is the most underused technique for beginners. After every sunk ship, mark off its surrounding cells before resuming the hunt. In a full game, adjacency elimination saves an average of 8–12 shots.
6. Spread Your Ships Across All Four Quadrants
During placement, distribute your fleet so no two ships share the same quadrant of the board. This forces your opponent to hunt all four areas before finding your full fleet.
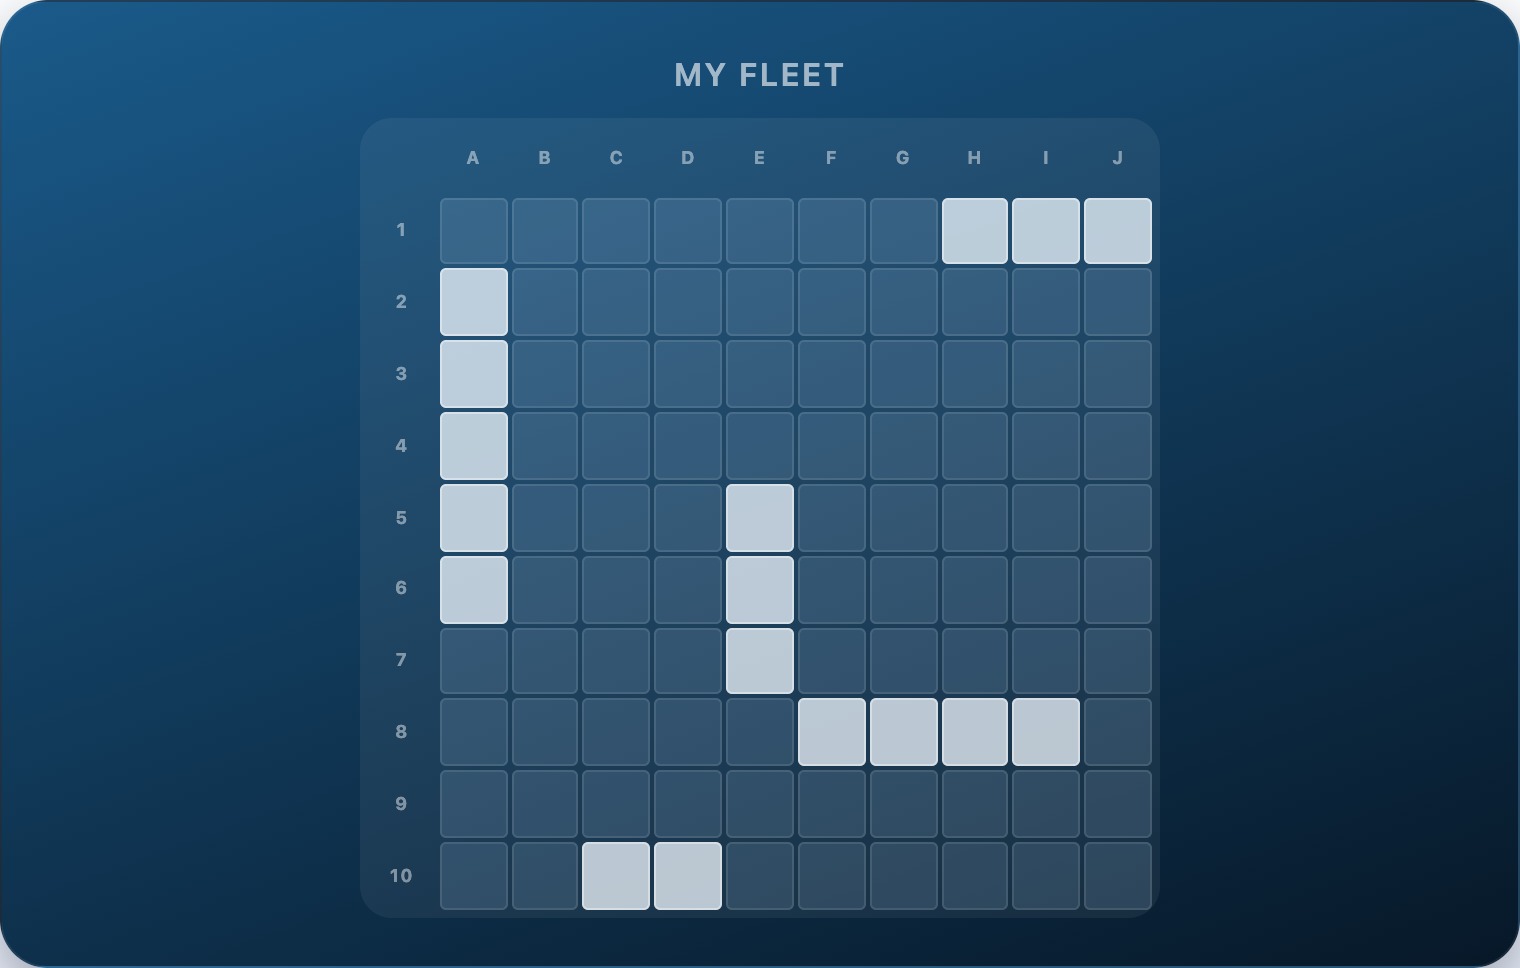
Carrier in the upper-left, Battleship in the lower-right, Cruiser in the upper-right, Submarine in the centre, Destroyer in the lower-left. No two large ships share a quadrant. An opponent who finds the Carrier early gains no proximity information about where the Battleship might be.
A clustered fleet means one good sequence of shots can expose multiple ships. Spread placement forces your opponent to make a full-board search.
7. Vary Your Ship Orientations
An all-horizontal or all-vertical fleet is easier to hunt systematically. Mix orientations to deny your opponent the ability to rule out entire rows or columns quickly.
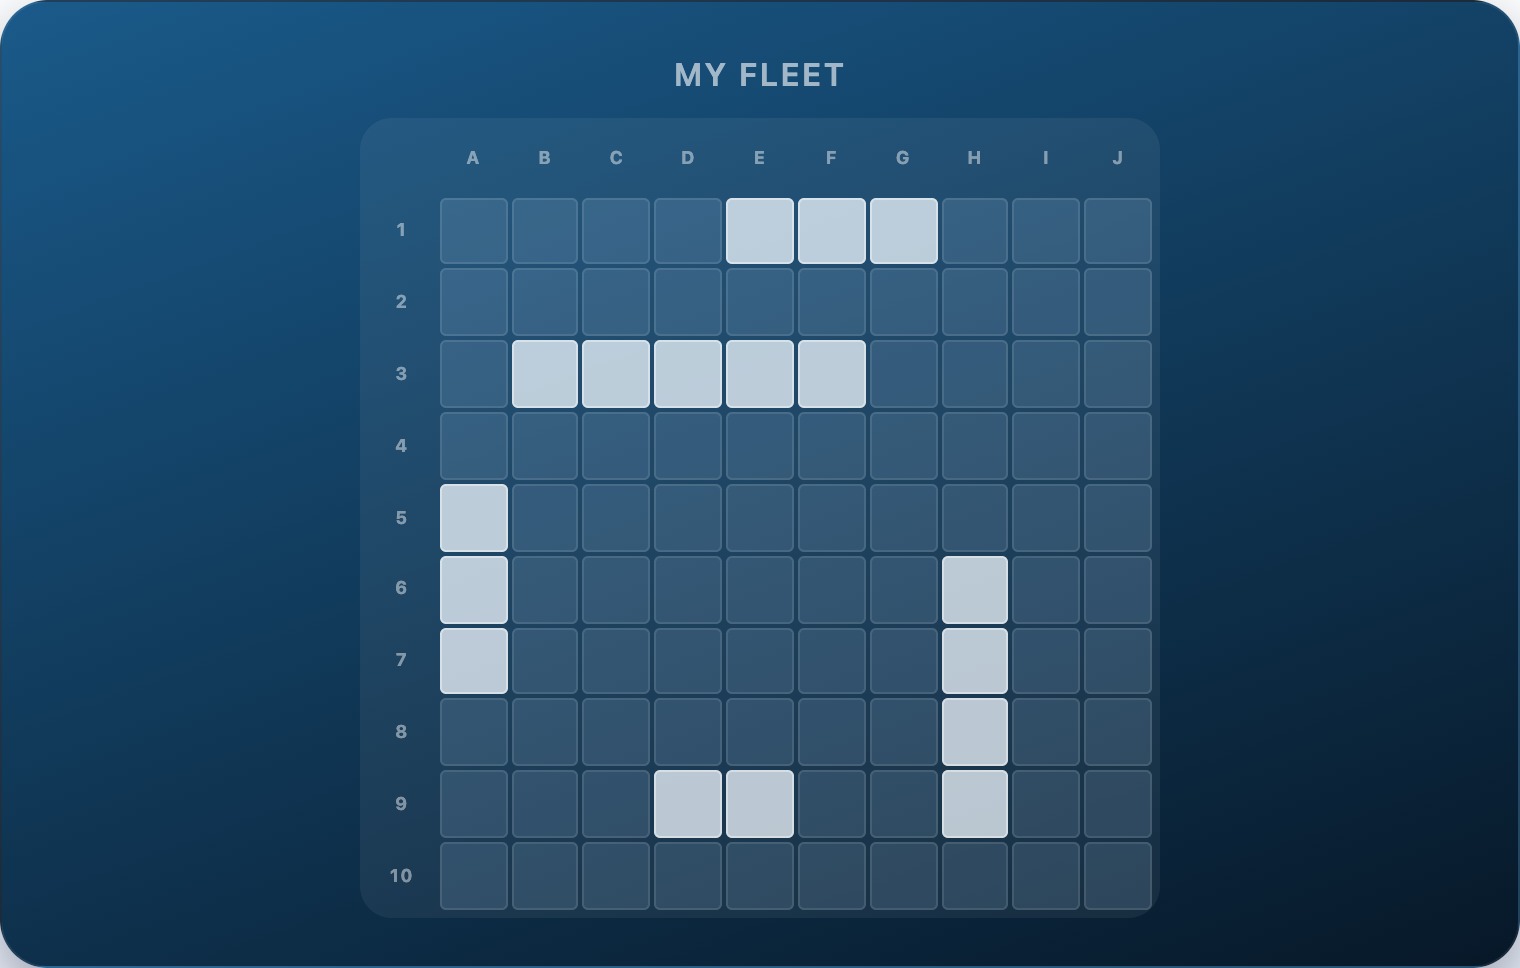
Carrier and Cruiser are horizontal; Battleship and Submarine are vertical. An opponent who scores a miss on a vertical probe of the Carrier's row cannot conclude all ships are horizontal — the Battleship proves otherwise. Mixed orientations make pattern-based deductions harder.
If all your ships are horizontal, a miss in the middle of a row tells your opponent that no ship is centred in that row. Vertical ships remove that shortcut.
8. Adapt Hunt Spacing After Small Ships Are Sunk
Once the Destroyer (2 cells) is sunk, the smallest remaining ship is 3 cells. You can now space your hunt shots every 3 cells and still guarantee a hit on every remaining ship — covering the board in fewer shots.
Destroyer sunk. Rows A-C already covered with spacing-2. For rows D-J, switching to spacing-3 covers the same ships with 20 shots instead of 35. The Carrier (5), Battleship (4), Cruiser (3), and Submarine (3) all have at least 3 cells — none can hide in a 2-cell gap.
This calibration saves an average of 8–12 shots in games where you sink the Destroyer early. It is purely mechanical — if the smallest remaining ship is N cells, you can use spacing N-1.
9. Do Not Fire at Cells Where No Ship Can Fit
As the game progresses, misses and sunk ships leave gaps that are too small for any remaining ship. Never fire into these gaps.
B7 is a single isolated cell — bounded by the sunk Destroyer on the left and a miss on the right. The remaining ships are all 3 cells or longer. A 1-cell gap cannot hold any of them. Firing B7 is a guaranteed waste. Strike it from the hunt list.
Each time you sink a ship or fire a miss, scan the surrounding area for gaps that are now too small for remaining ships. Eliminating these cells compounds over the game into significant shot savings.
10. Keep a Mental Model of Remaining Ships
At any point in the game, you know exactly which ships are still afloat. Use this knowledge to set expectations and avoid spending extra shots confirming information you already have.
Submarine and Destroyer sunk. Three ships remain: Carrier (5), Battleship (4), Cruiser (3). The hit at H3 must belong to one of them. Because the smallest remaining ship is 3 cells, the ship extends at least 2 more cells from H3. This fact narrows the target-mode search before a single adjacent shot is fired.
Knowing which ship sizes remain lets you calibrate target mode intelligently. A hit when only the Carrier is left means you are looking for a 5-cell ship — you can extend your axis search further before expecting a miss.
Put the Tips Together
The strongest battleship players combine all ten: they hunt with the checkerboard, switch immediately to target mode on a hit, lock the axis on the second hit, count hits to know when ships are sunk, eliminate adjacent cells after each sink, place their fleet spread and mixed, and adapt their hunt spacing as ships go down.
Each tip individually saves a shot or two. Together they reduce your average game length dramatically. Play Battleship on Playboard — no sign-up needed, challenge a friend or test your patterns against a bot.
Frequently Asked Questions
- What is the most important habit to build in battleship?
- Switching immediately to target mode after a hit and not returning to hunt mode until the ship is fully sunk. Beginners lose the most time by scoring a hit, firing one adjacent cell, missing, and going back to random fire. Once you have a hit, follow it until the ship is sunk — the information from that hit is too valuable to abandon.
- Why is the checkerboard pattern better than random firing?
- Every ship occupies at least two consecutive cells. On a checkerboard, every pair of adjacent cells contains exactly one coloured cell. This means no ship can hide entirely on the colour you are skipping — you are guaranteed to hit every ship using only 50 shots instead of the up to 100 a random approach might require.
- Where is the safest place to put my ships?
- There is no universally safe placement, but spreading ships across all four quadrants makes your opponent's hunt much less efficient. Ships placed near the centre are found earlier on average because most players start hunting there. A cluster of ships in one area means a single lucky hit sequence can find multiple ships at once.
- Should I tell my opponent which ship was sunk?
- Playboard announces sunk ships automatically. This is standard battleship — knowing which ship was sunk helps both players calibrate their hunt patterns and is part of the game's information structure.
- Is it ever worth firing off-pattern in hunt mode?
- Sometimes. Pure checkerboard is well known, and an opponent who places ships on the skipped colour can hide them longer. Mixing in occasional off-pattern shots — especially toward the end of the hunt — makes your search less predictable. But do not abandon the pattern entirely; the efficiency advantage is real.
- What should I do when I have two active hits on different ships?
- Focus on sinking one ship completely before chasing the other. Two open hit sequences simultaneously can lead to axis confusion and wasted shots. Pick the sequence with more information (two consecutive hits vs one isolated hit) and finish that ship first.